
New soundboard on MS guitar
Ever since building my first ‘flat-top’ guitar in the early 1980s, all have had a slightly curved soundboard: flat wood pulled over curved braces. But in mid 2020 I built three experimental guitars, one a Martin Simpson model and two New World models, all of which had truly flat soundboards. In other respects the soundboard design and bracing were unchanged.
A guitar takes a while to find its voice. Both New Worlds opened out nicely and sound lovely. But I didn’t love the MS.
Why would two sound excellent and one not so good? Every piece of wood is different, different size guitars react differently to the same bracing system, and there are always variations between even ostensibly identical instruments. Maybe just bad luck that one wasn’t so good. Maybe good luck that two were excellent.
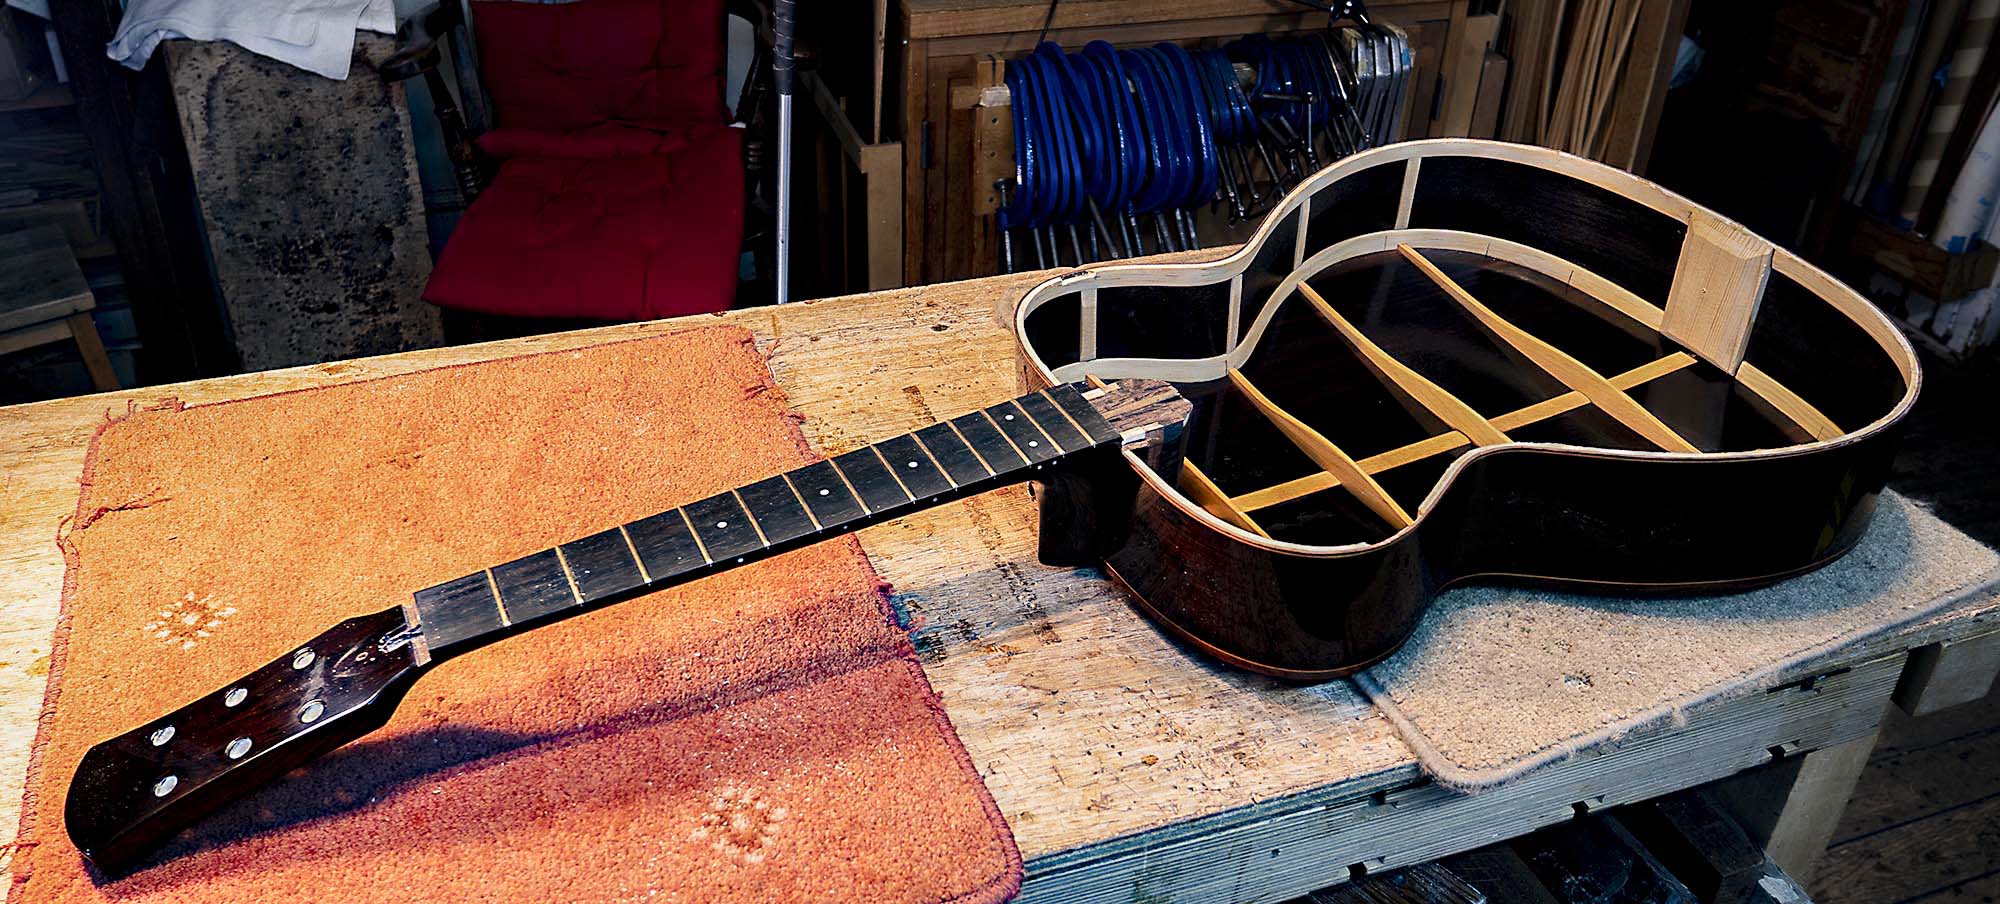 The old soundboard and dusty end of the fingerboard have been removed, leaving the top lining and the neck extension visible. The Wengé neck extension was reluctant to release the soundboard and suffered minor damage which will be sorted later. The body end of the truss rod is just visible.
In any case, after looking at, playing and wondering about the flat-top MS model, almost on an impulse I cut off the soundboard so as to replace it; I had a ready built curved soundboard I’d rejected for use on a new instrument (because of a tiny and almost invisible cosmetic flaw) which I could use.
Because my neck joint is built in to the body, removing the neck isn’t an option, which makes top replacement more complicated. But here goes.
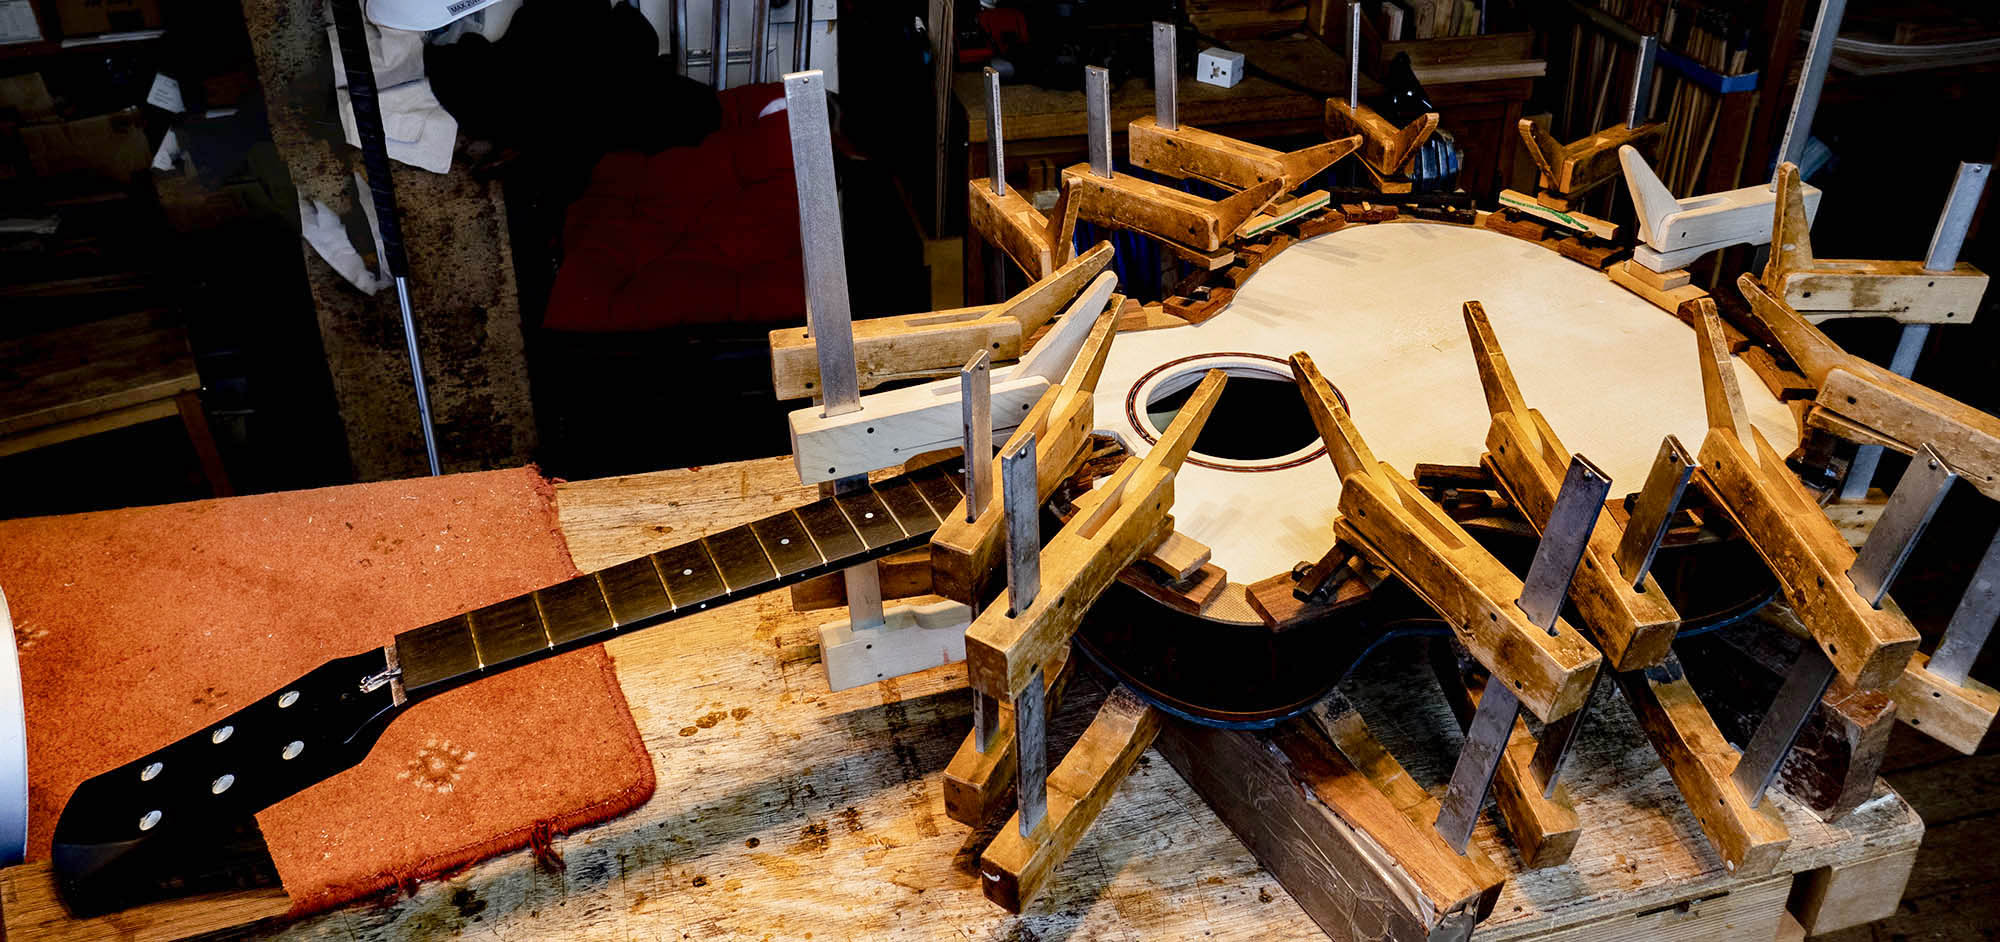 The soundboard clamped on while the glue dries – I love these wooden cam clamps.
.
First I cut off the soundboard; I had no interest in re-using it so was ruthless and totally destroyed it. I then cut the fingerboard at the 14th fret, removing and saving the end section to re-fit later.
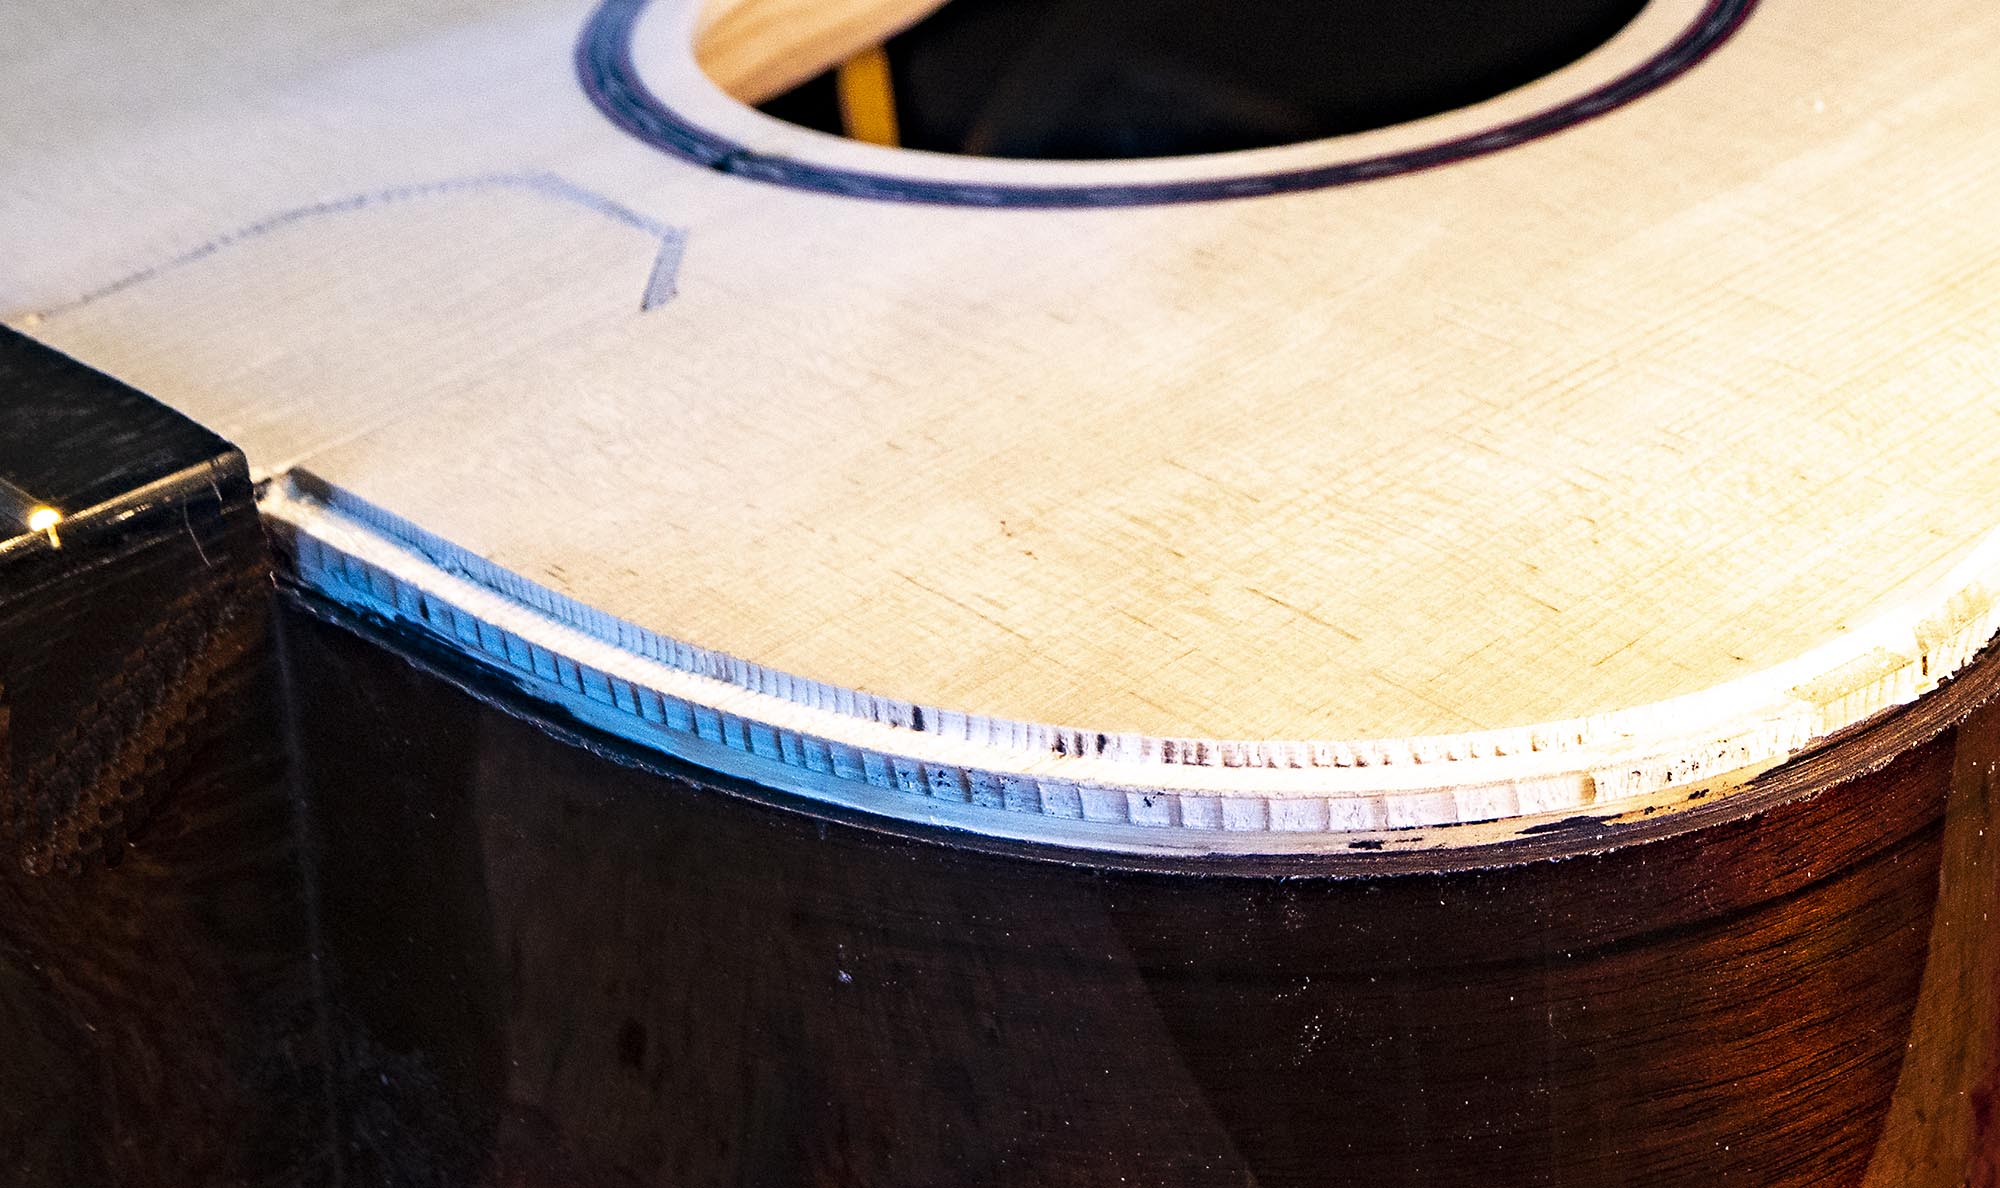
Next job was to offer the new soundboard to the sides. Because the original was flat and the new one curved, I scribed the sides and cut them down to allow it to sit precisely flush all round; it’s important that it fits exactly without needing to be pulled down by clamping.
I run white tape around the body to show the scribed line clearly. I also have to check the new soundboard meets the cut fingerboard at exactly the right level.
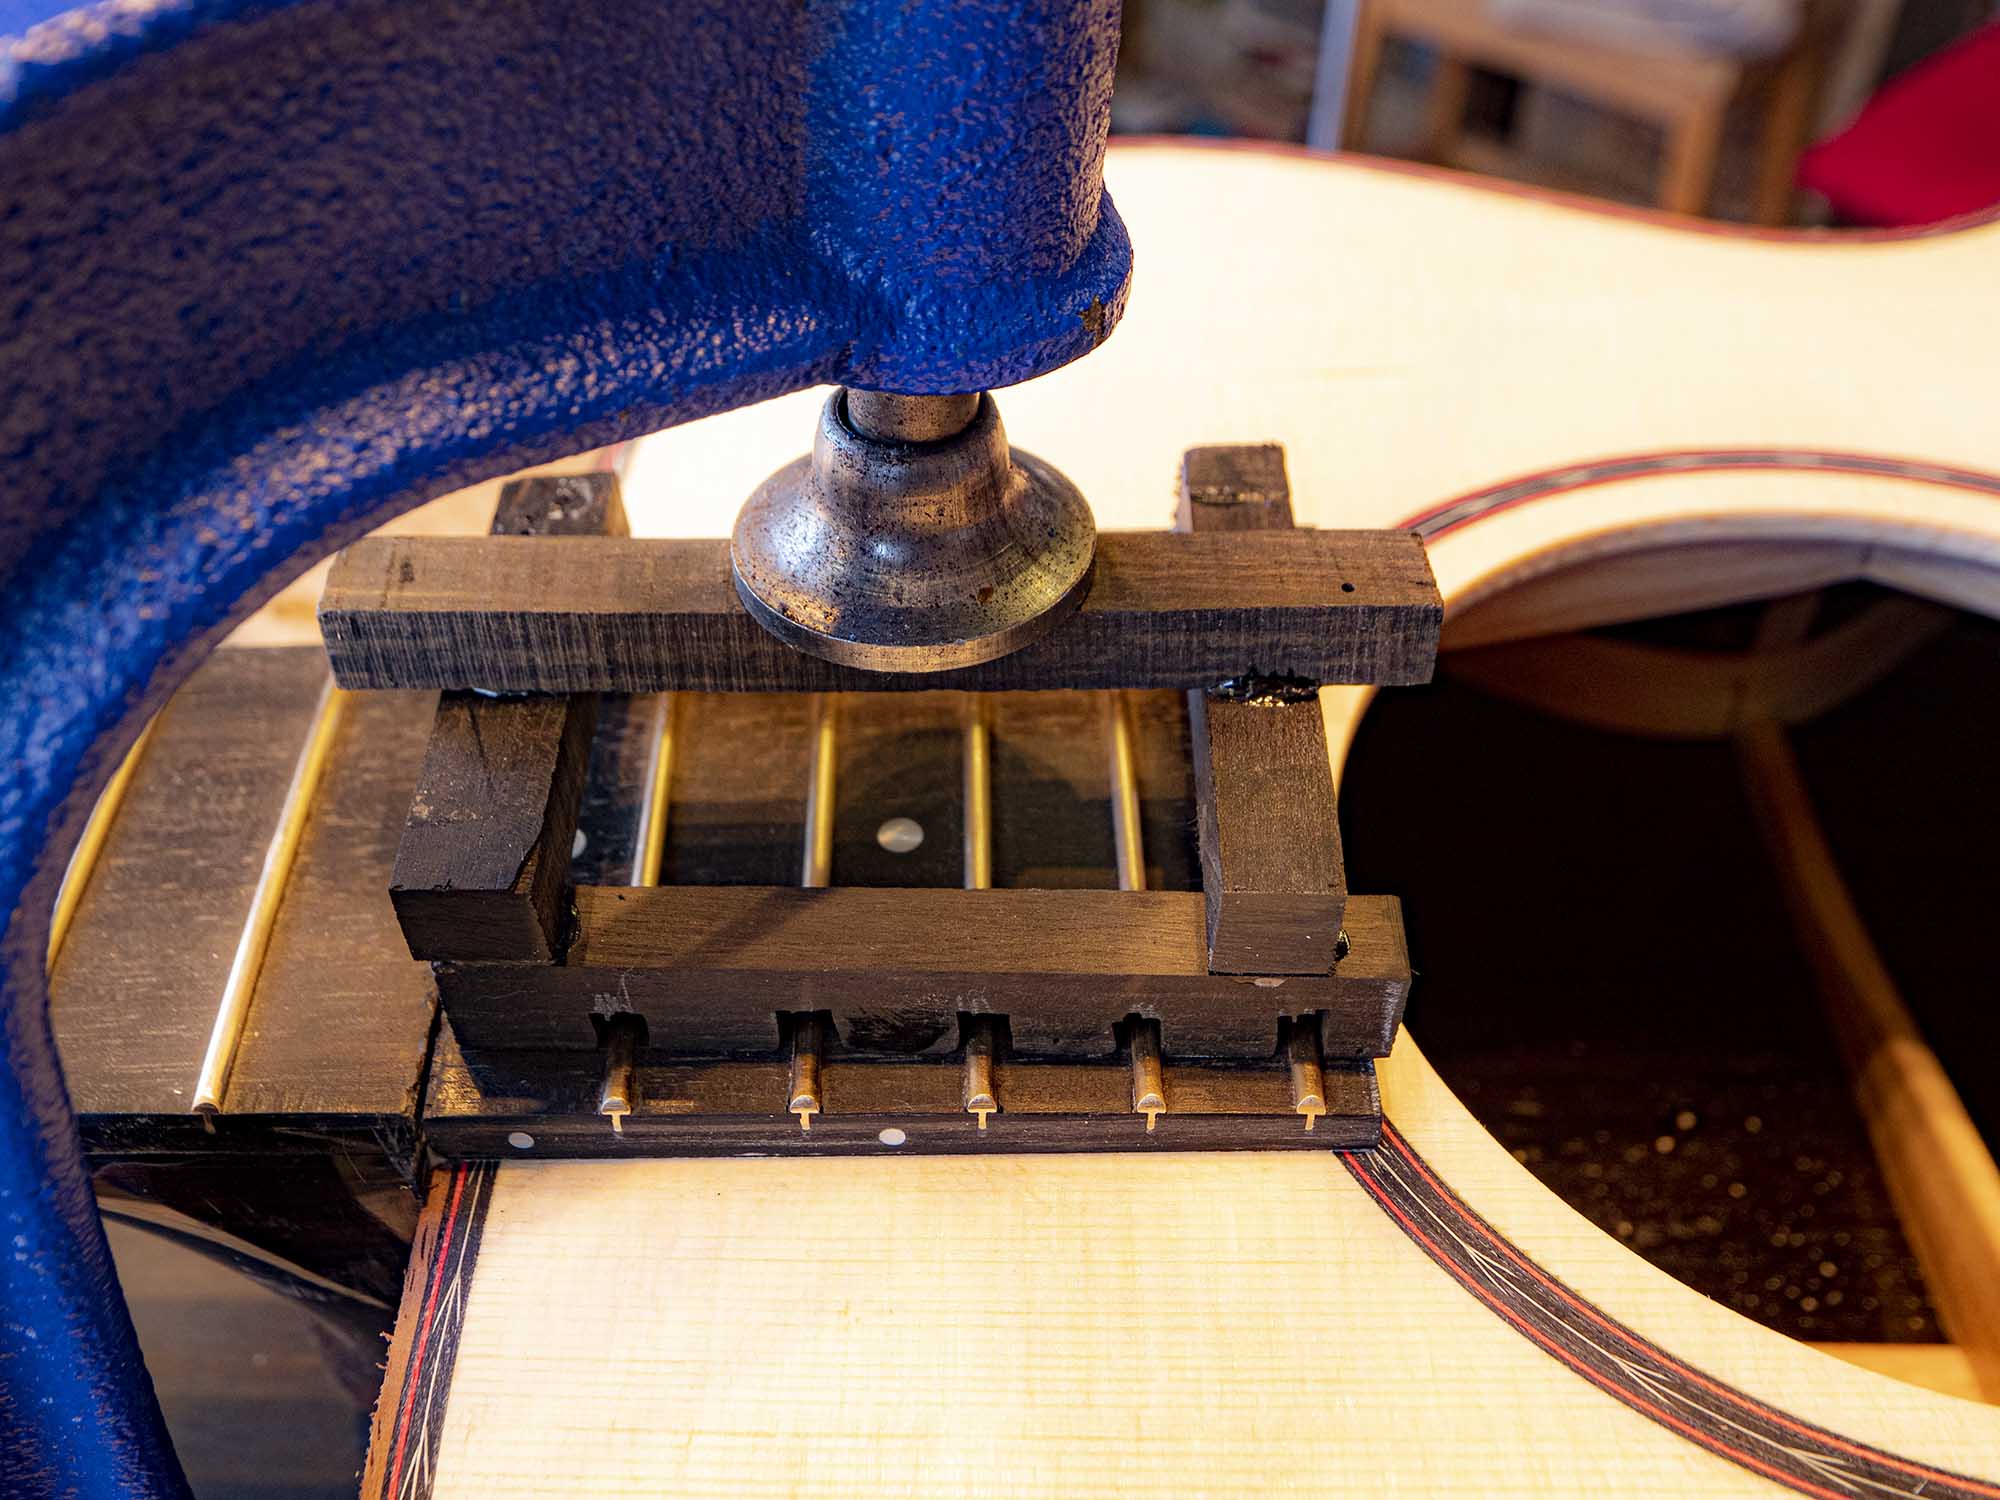
A guitar body without its soundboard has lost its rigidity, so the neck can move up or down to a considerable degree. With the soundboard fitted, the neck is fixed relative to the soundboard.
Since it must sit at the precise angle for the strings to meet the bridge at the right height, getting the neck correctly positioned before gluing on the soundboard was vital. It took a while before I was satisfied it lined up correctly.
Then I could glue on the replacement soundboard.
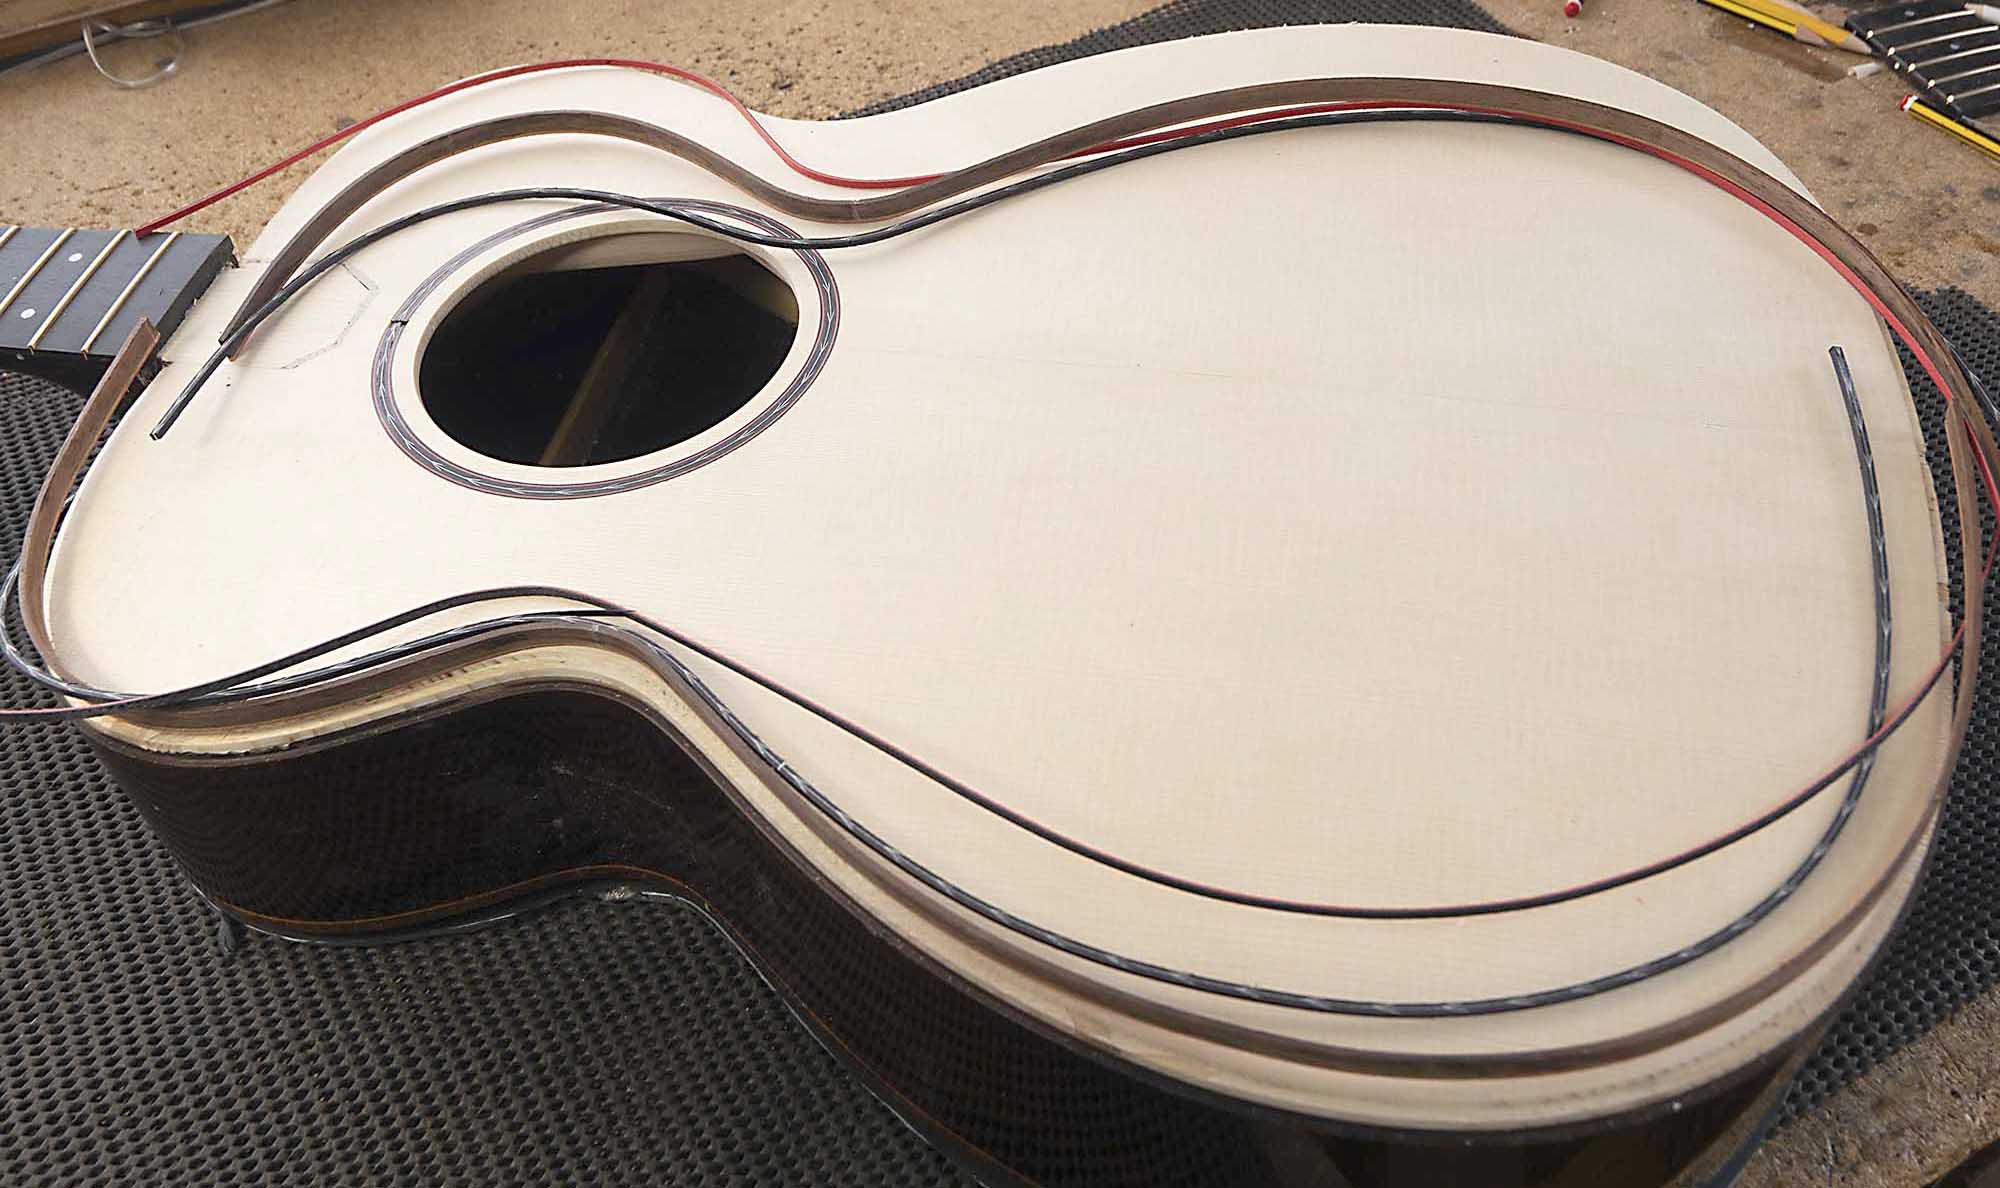
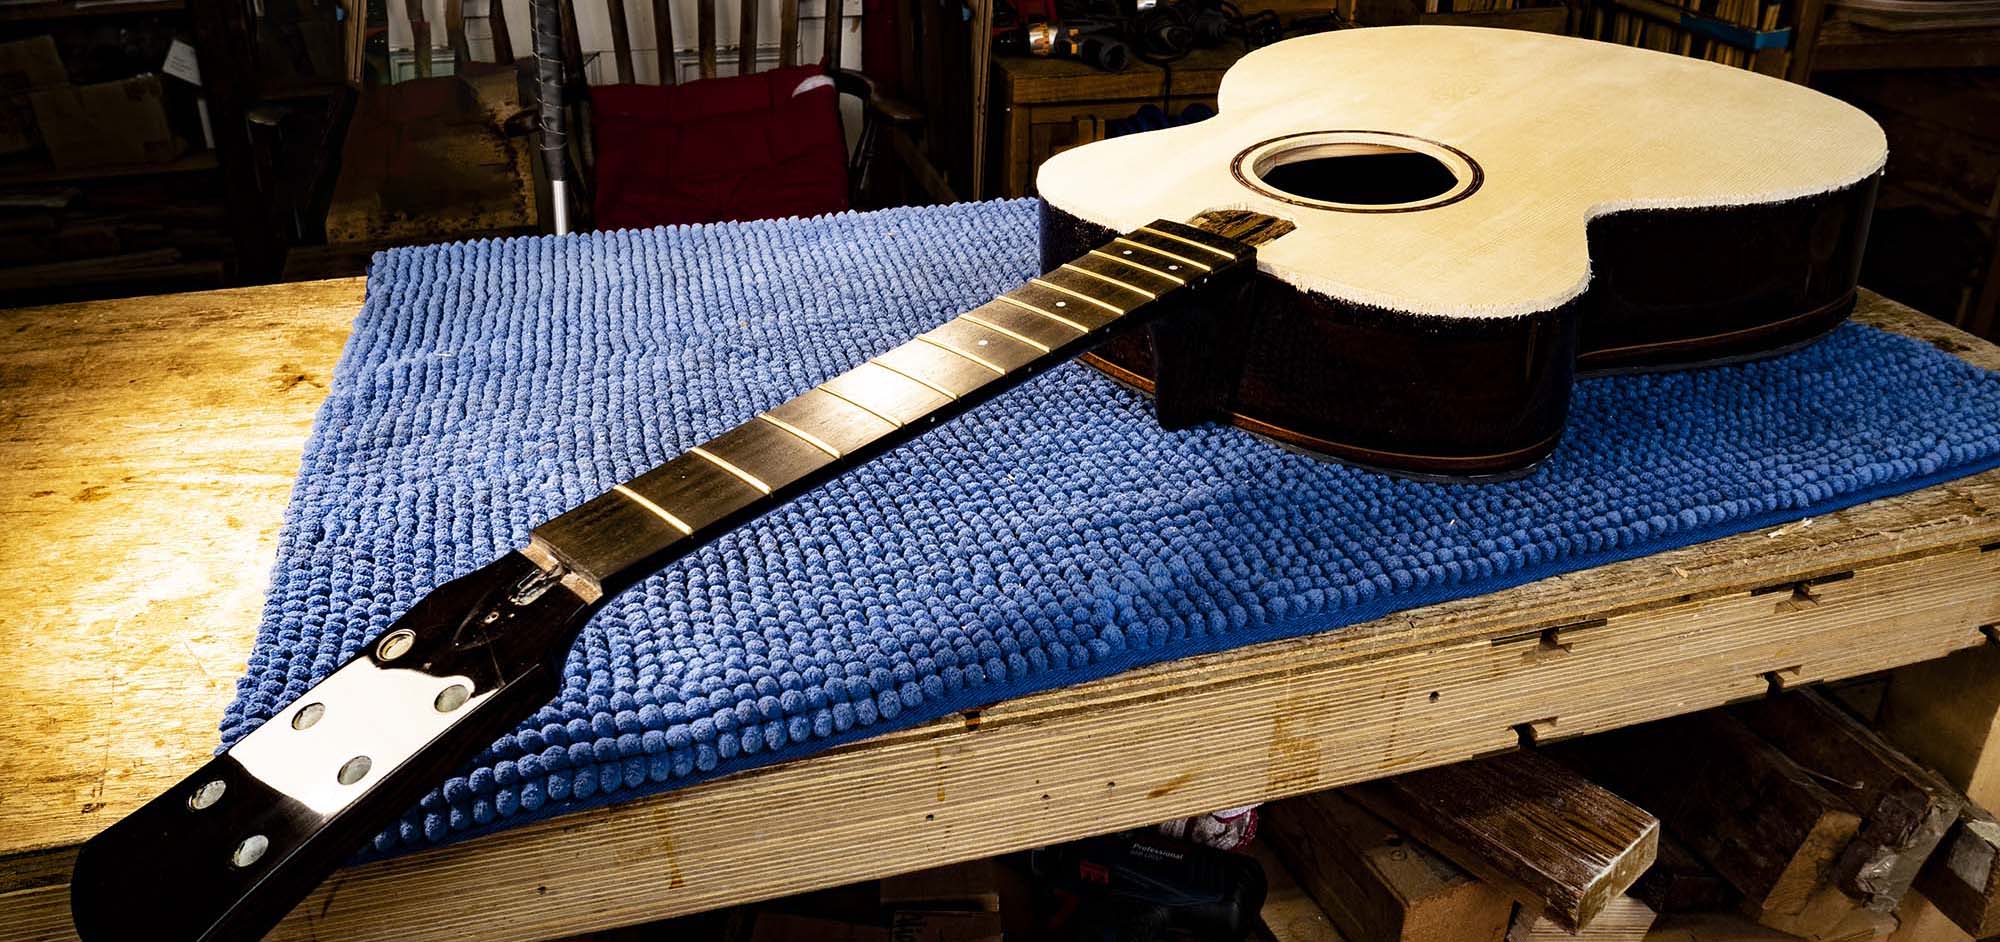 The soundboard trimmed to body size. The area above the neck extension had been removed before fitting.
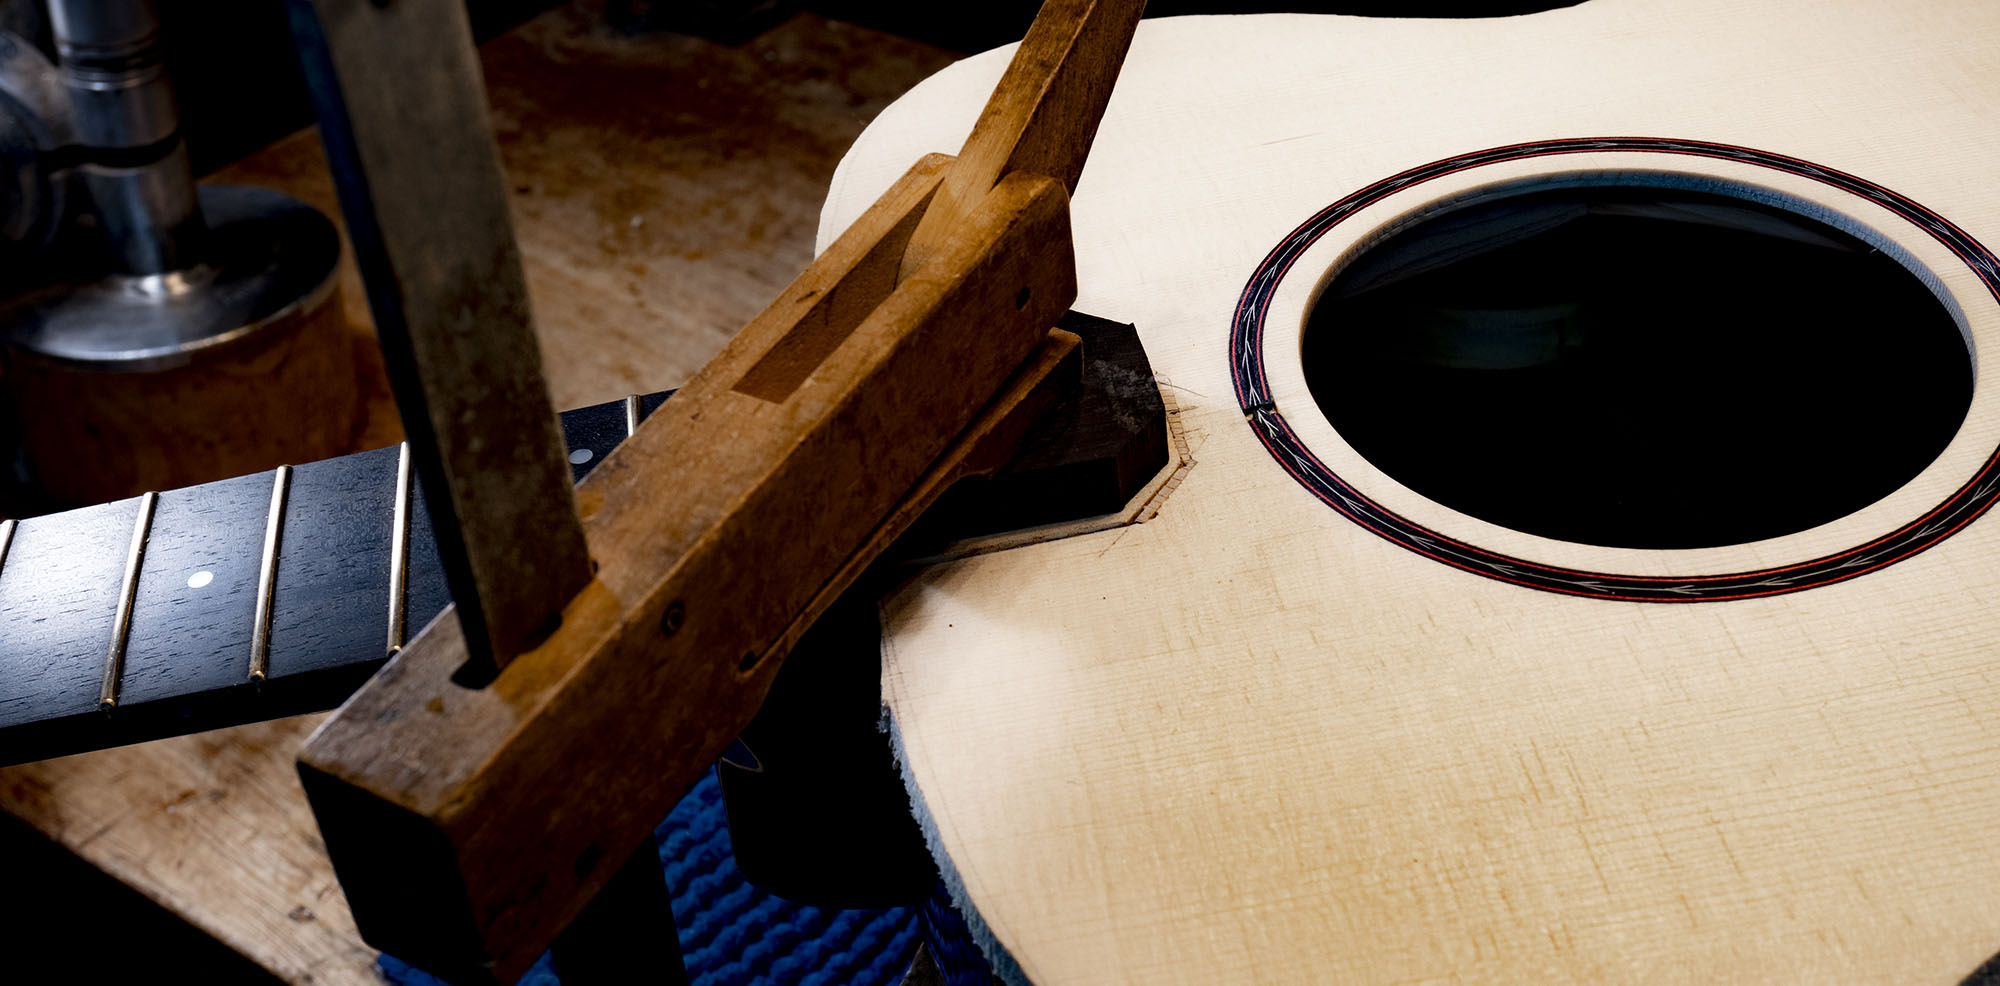 The neck extension has been locked firmly against the soundboard, and the space above it filled with another piece of spruce. It sits proud but will be leveled when the glue is dry; the neck and body are now rigidly connected and everything is ready for binding.
 I rout the binding and trim ledges with the ledge routing jig; the neck made life difficult and didn’t allow the jig to rout right up to it. So the last inch or so both sides I cut by hand. The neck also complicated fitting the neck end of the binding, which has to be fed between the soundboard and end of the neck.
 The ledges complete, the binding and two piece trim have been bent to shape on the bender. I’ve mitred the tail end of the bindings to join up with the back trim, and all have been cut to exact length. I was now ready to bind.
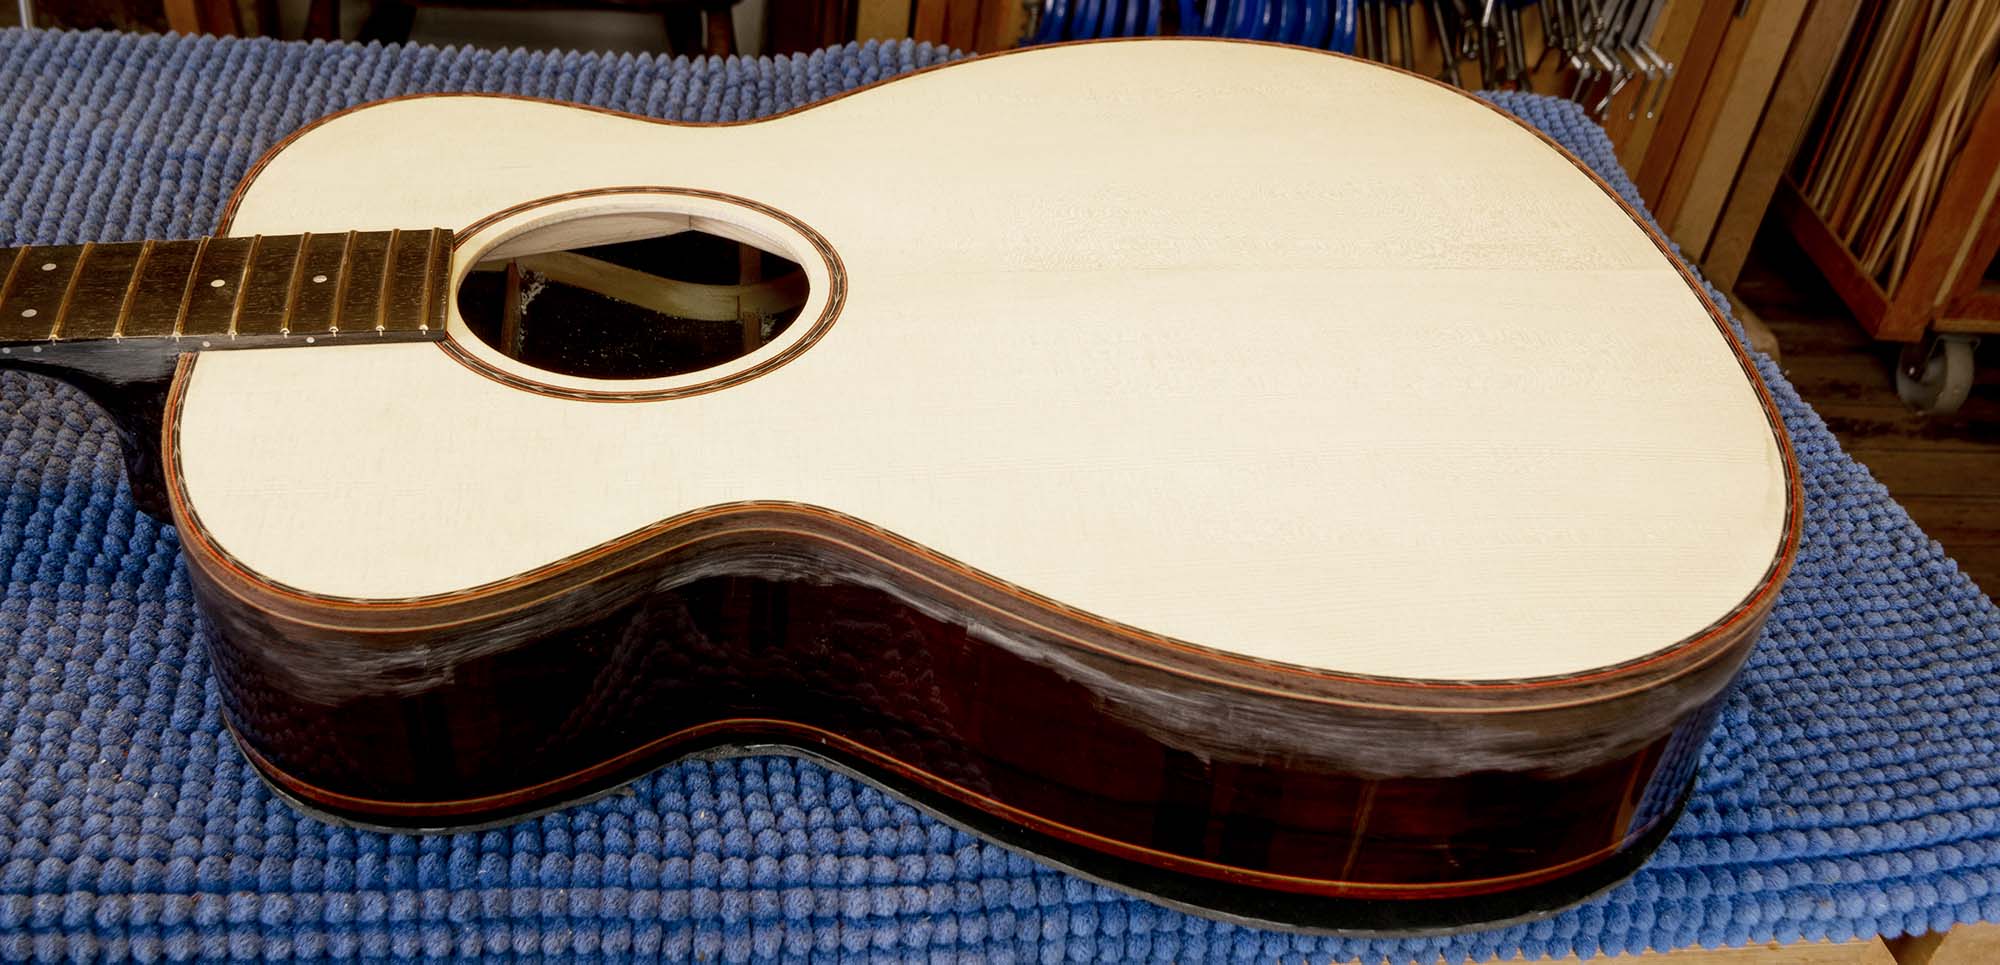
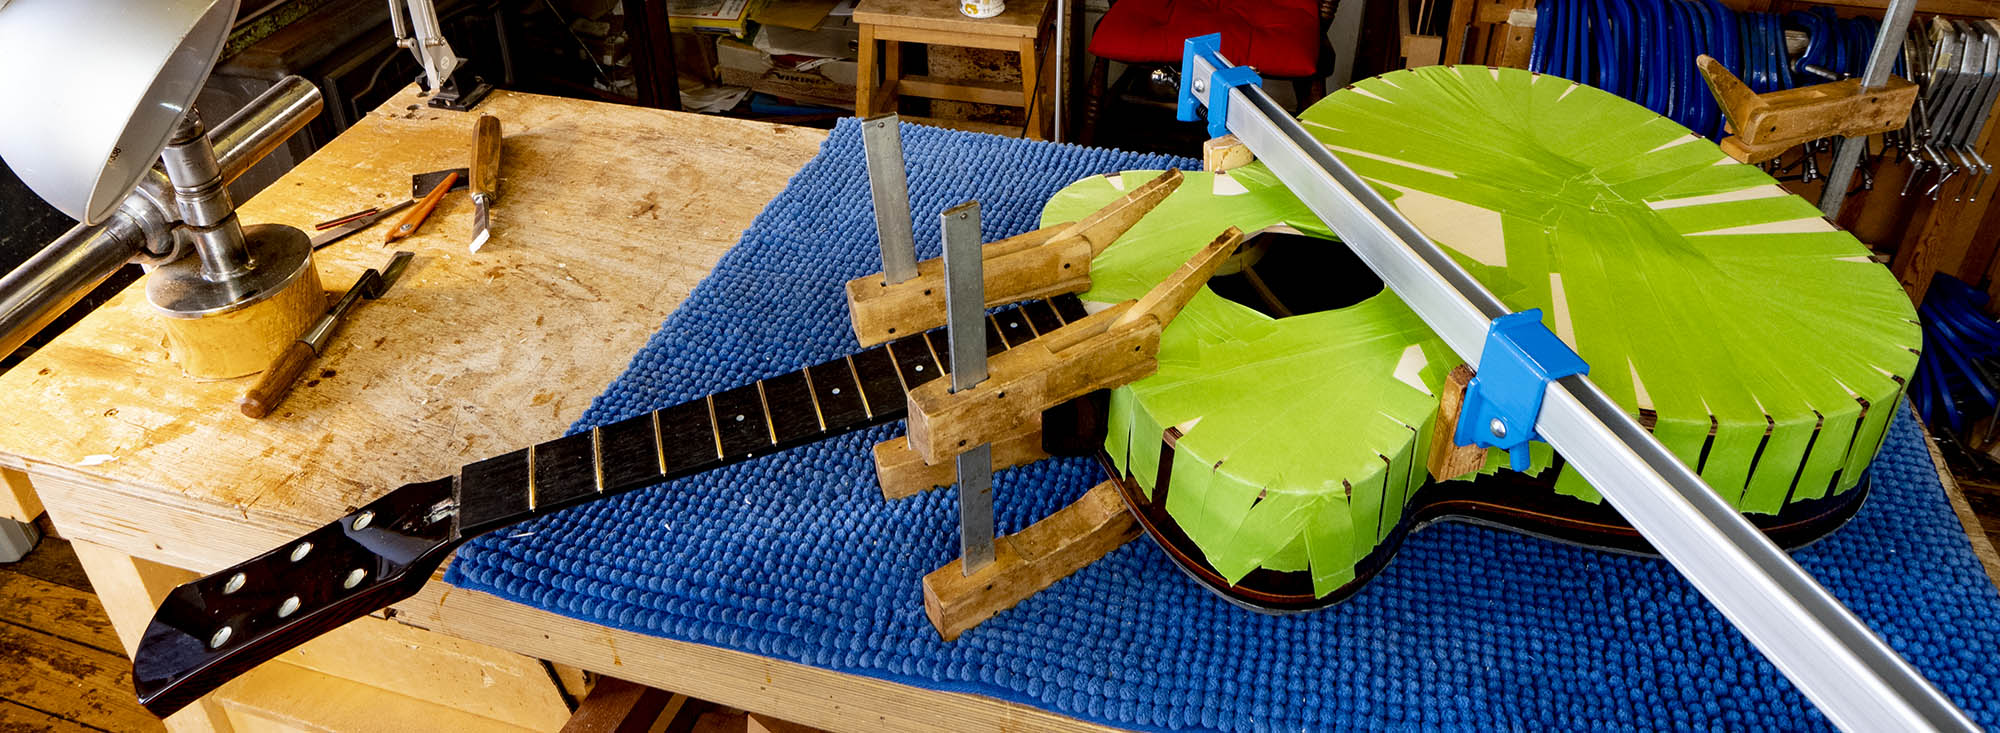 The bindings and trim are glued and firmly bound with garish tape. This could be the colour James Joyce described as ‘a scrotum tightening shade of green’.
The waist is clamped up, and the ends of the binding are also clamped down. Now I’ll leave it to dry overnight.
.
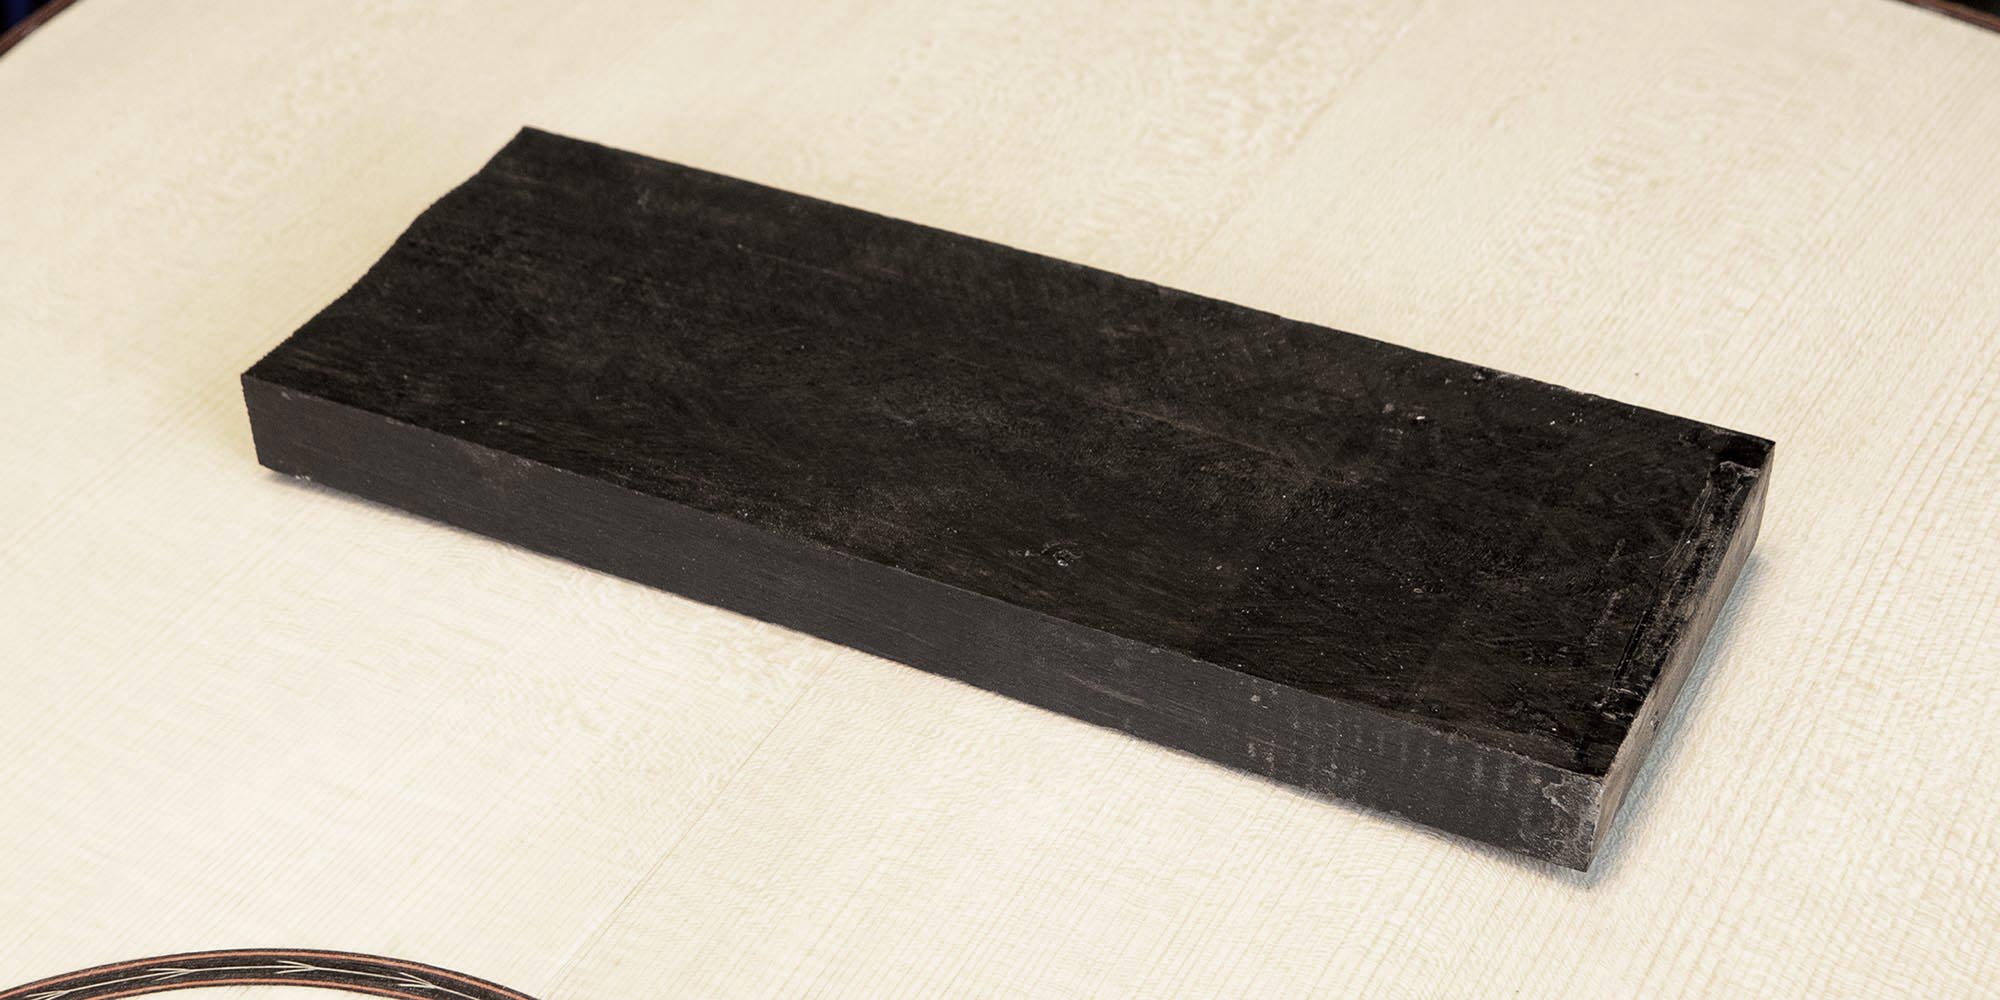 Ebony bridge blank
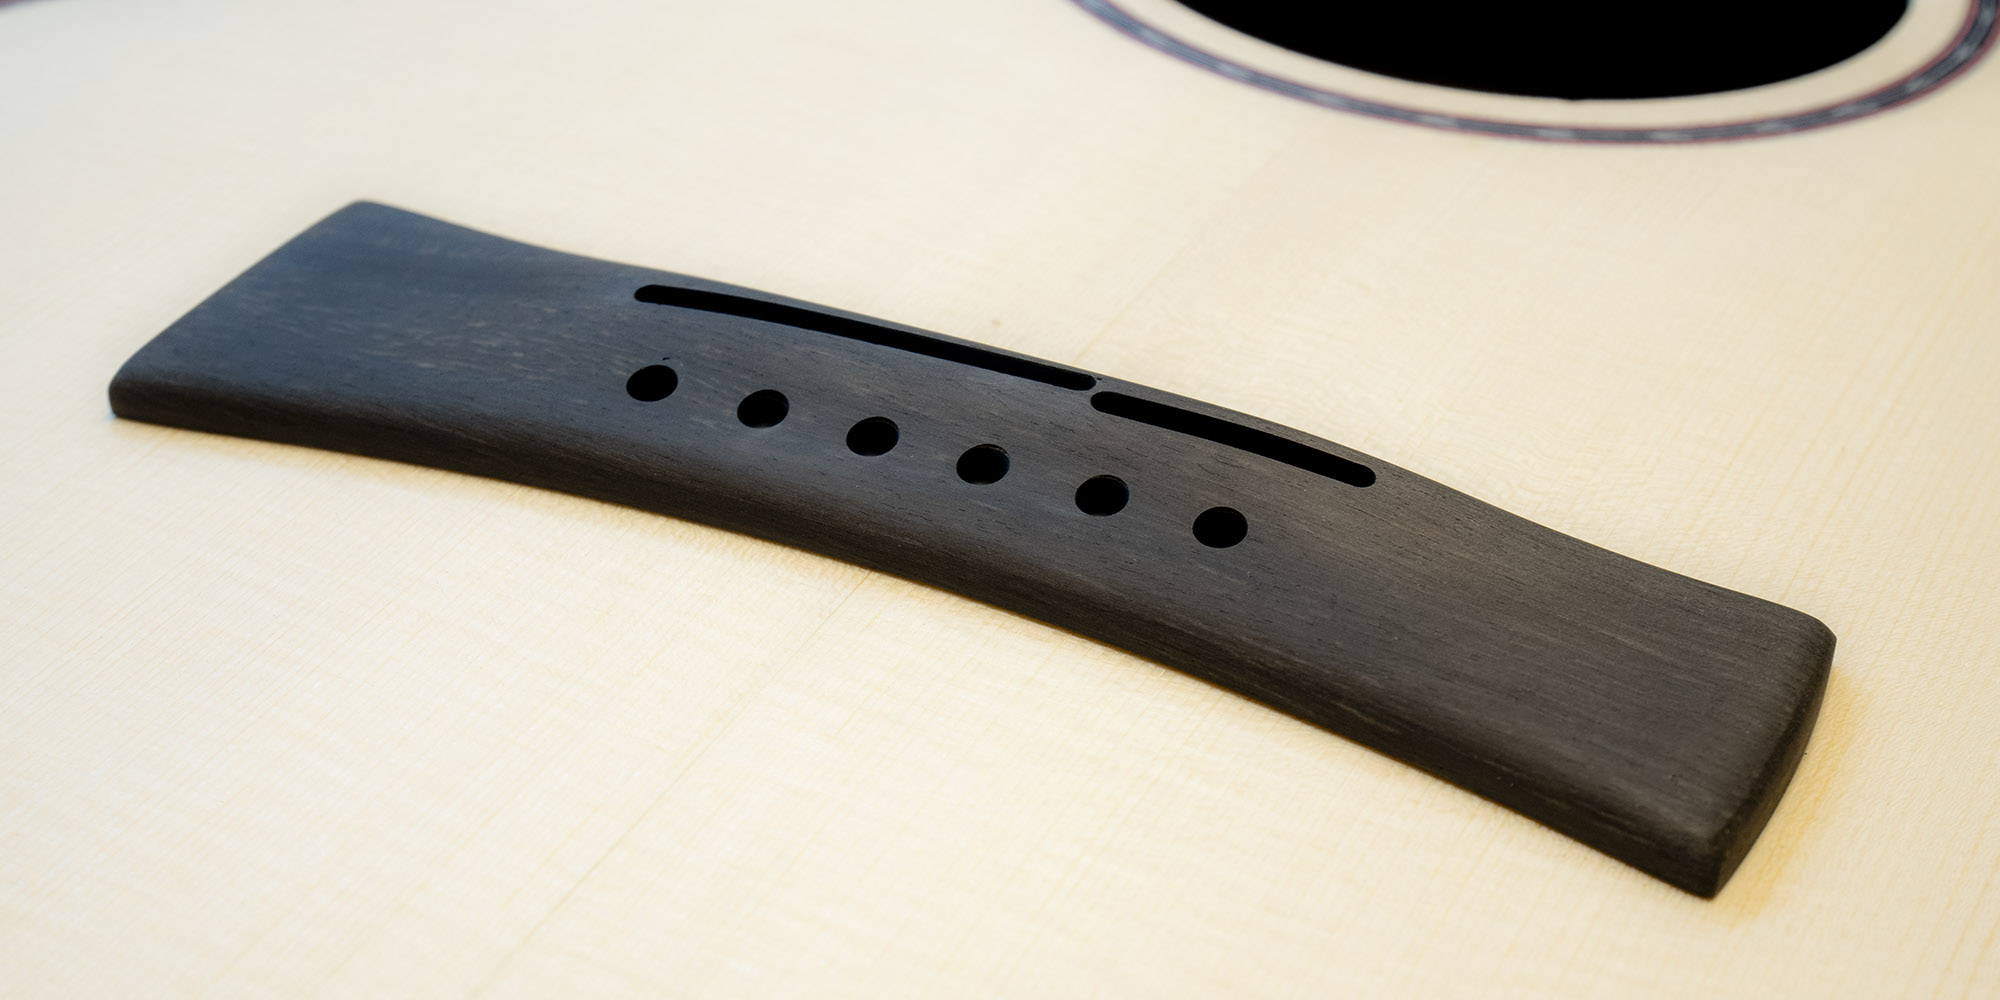 Bridge shaped and matched to soundboard curve, holes and saddle slots cut
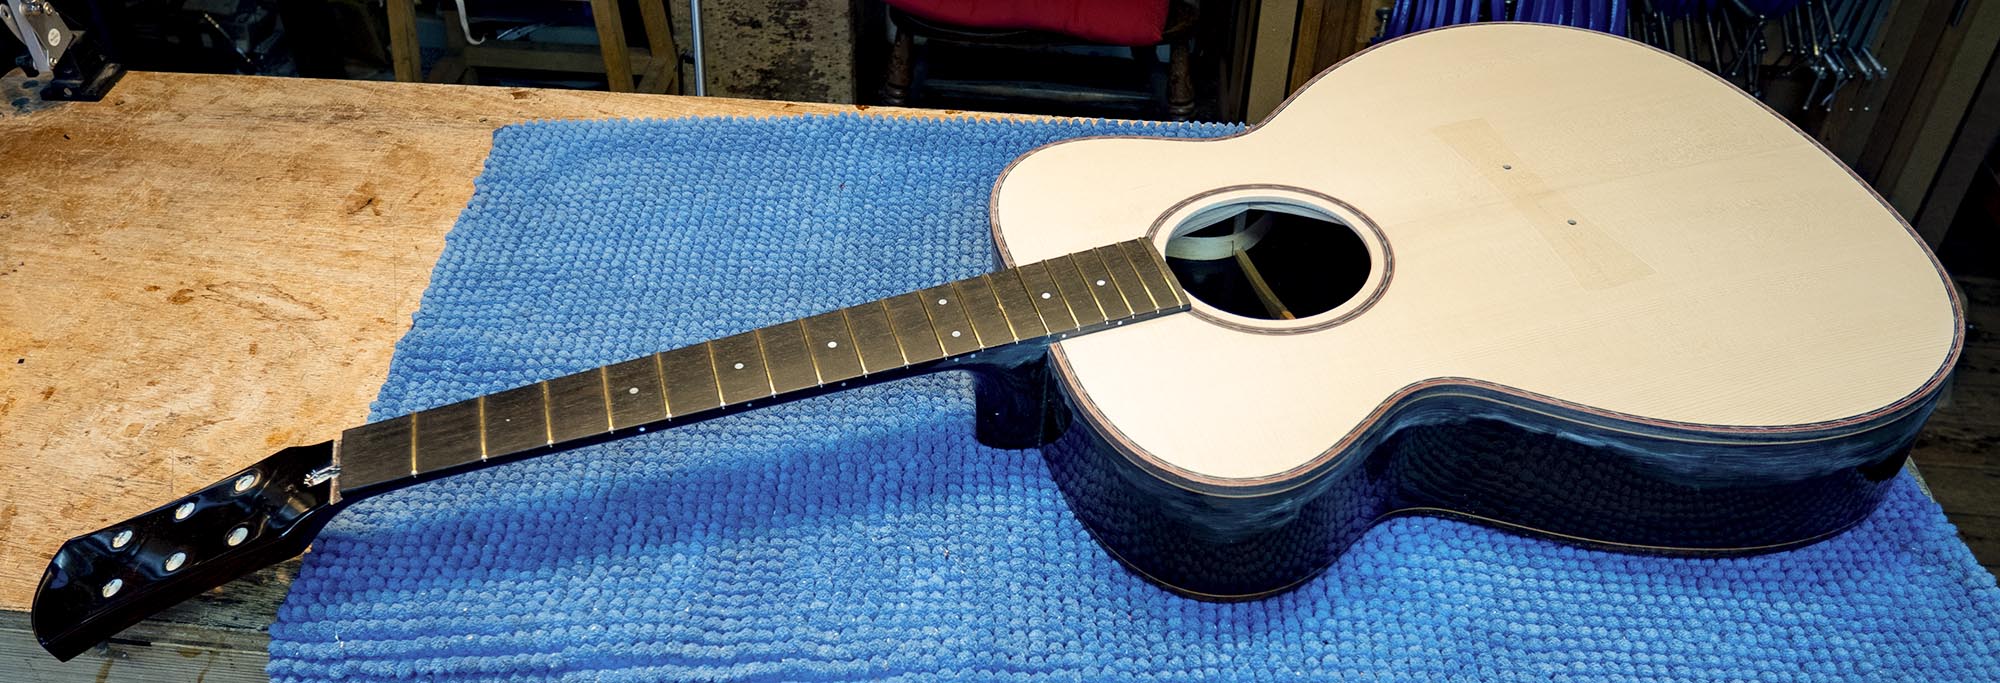 Looking perfect, now ready for Dave and the spraybooth. The taped off bridge area can just be seen, the tape will be removed after lacquering so the bridge glues onto bare wood.