
MS Anniversary model part 5
Routing for binding and trim
Binding is a complex operation. I use a StewMac routing system, whereby the guitar body is fixed to a carriage which allows me to move it around against a stationary router. This can move up and down to allow for the rise and fall caused by the curved back and front. Photos right show the stepped ledges for the binding and trim of both back and front. The different depth ledges are achieved by fitting different size bearings the body is pushed against.
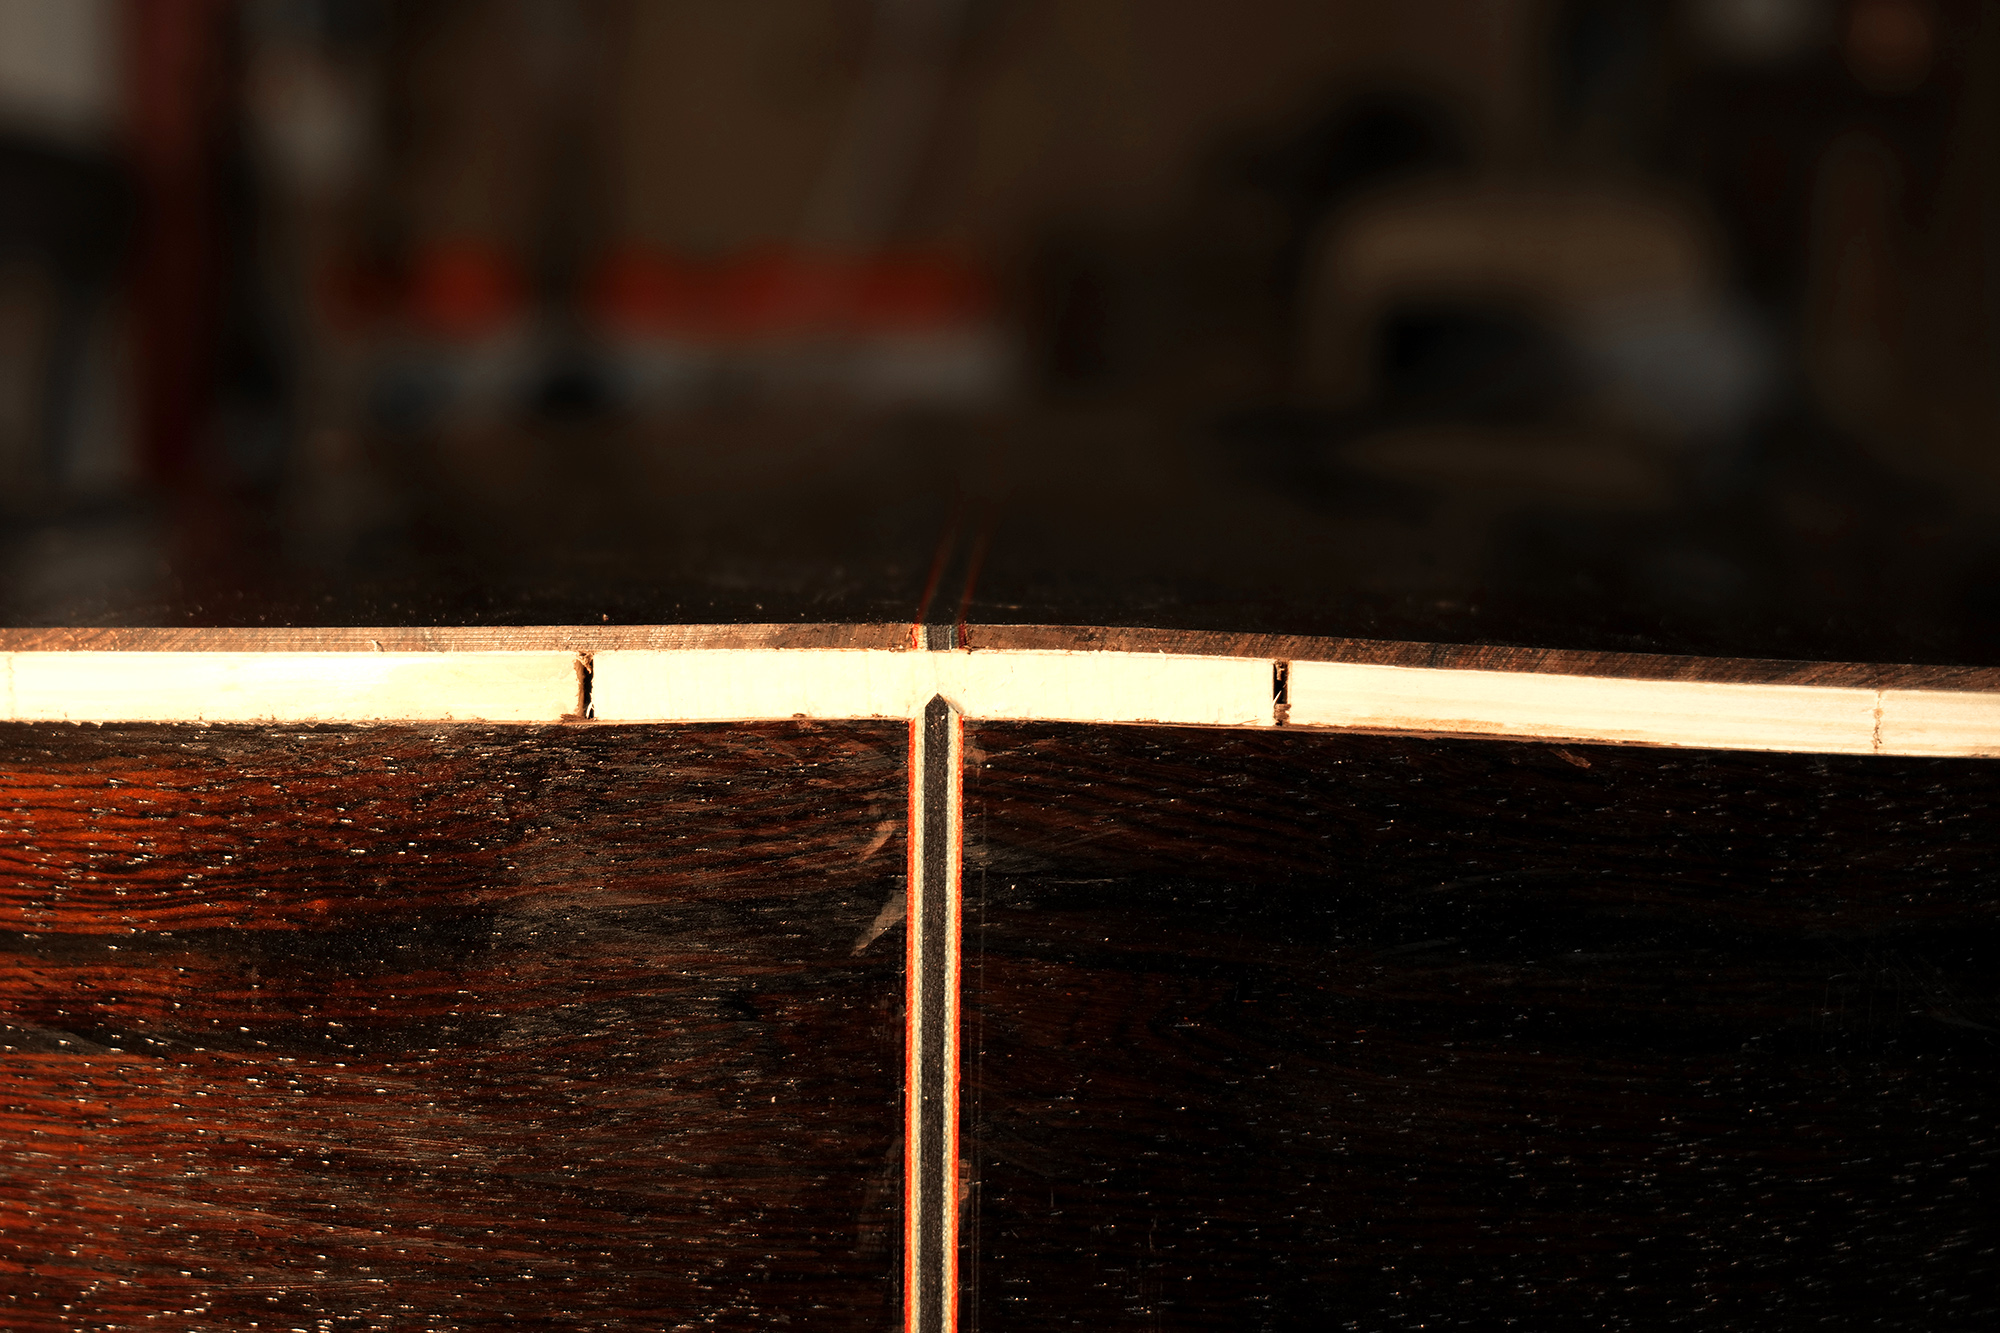
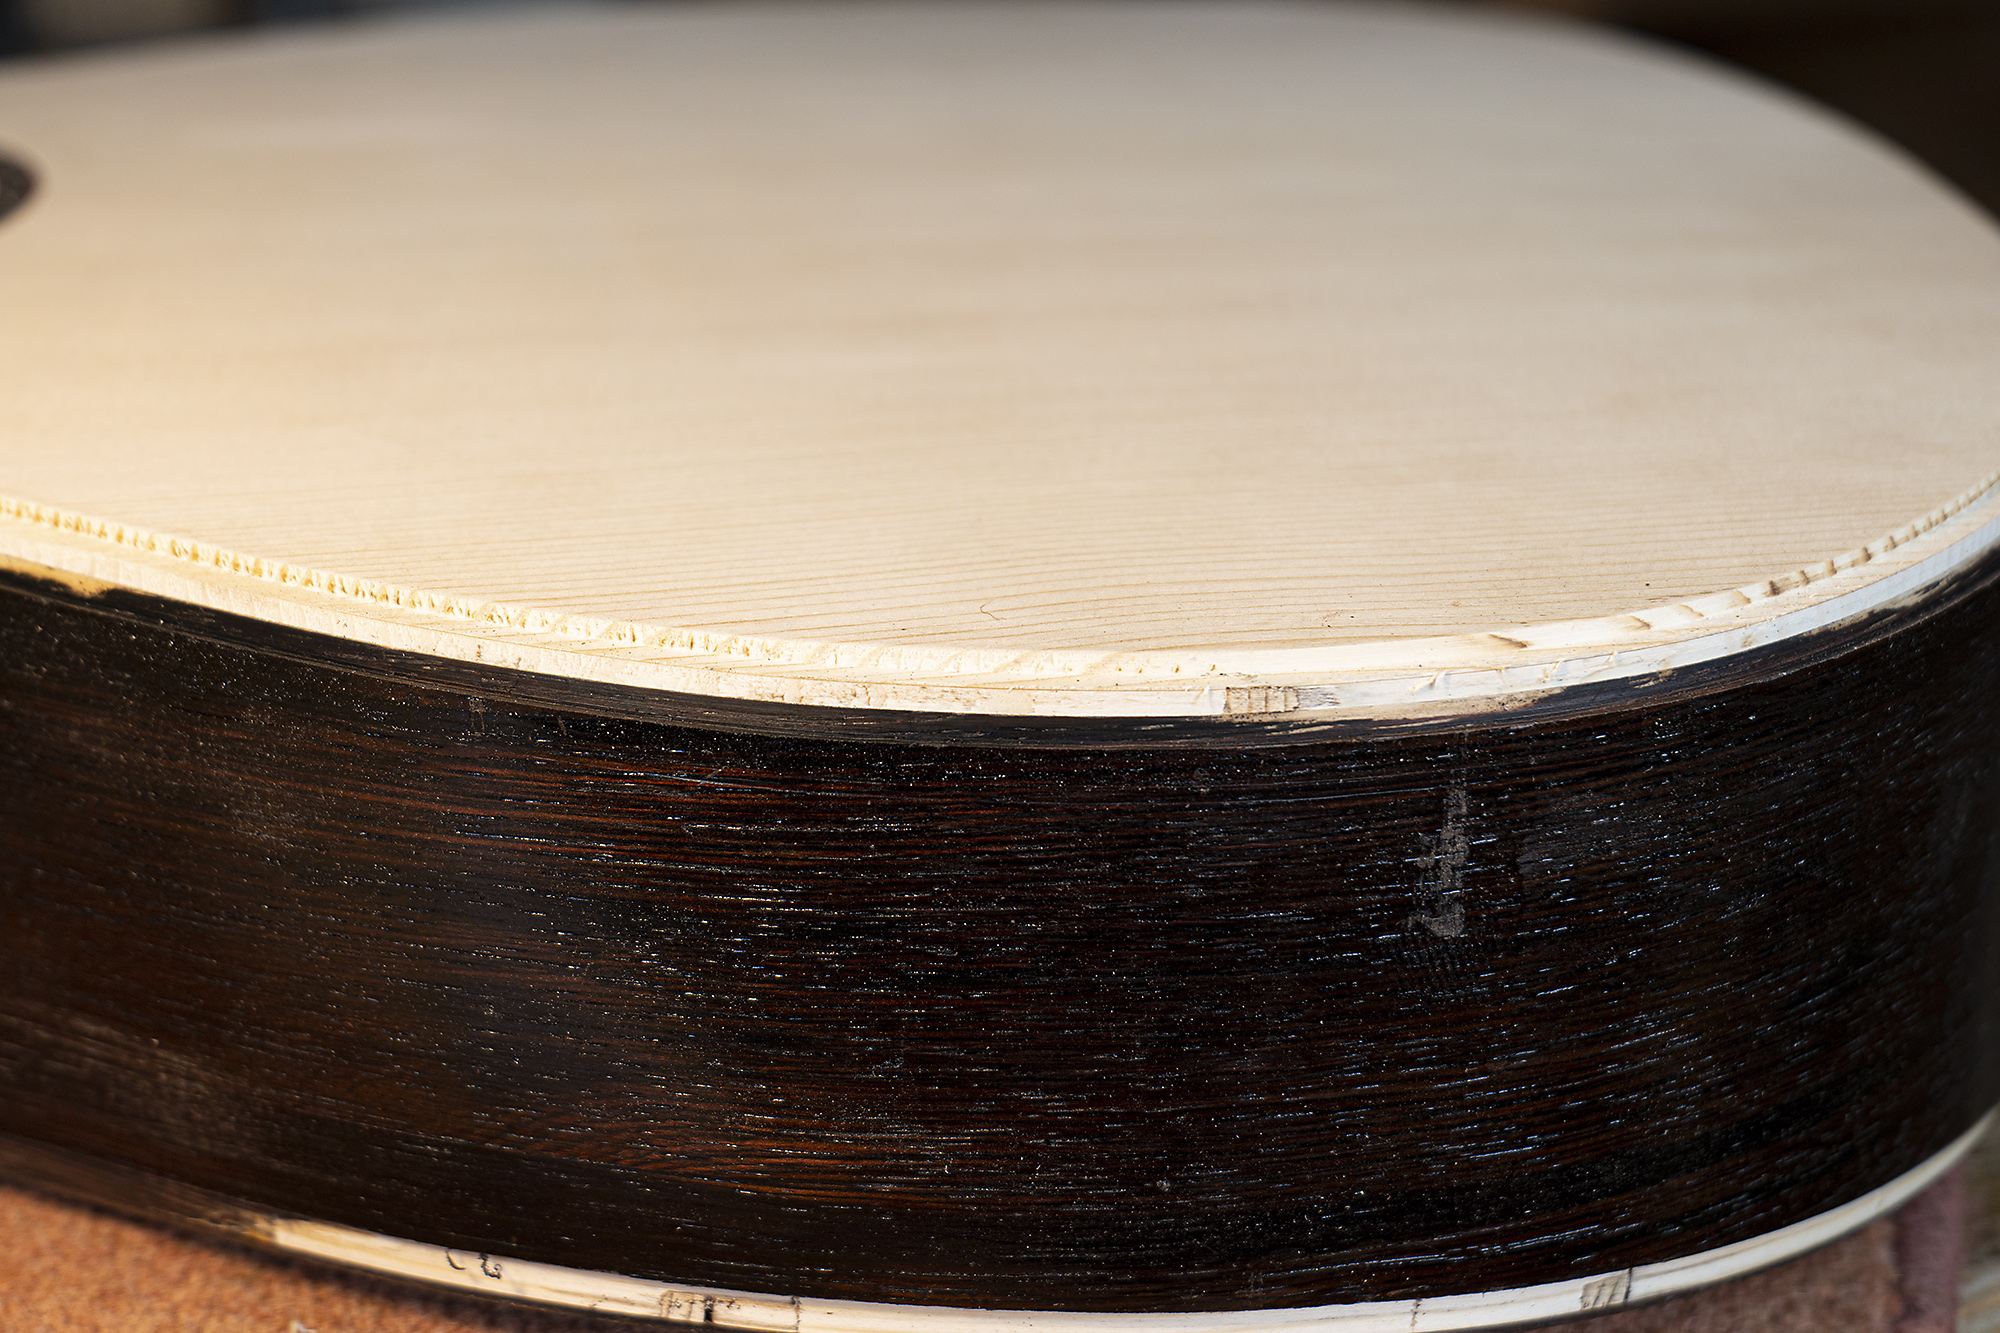 Top stepped ledge for binding and arrowhead trim plus red pinstripe
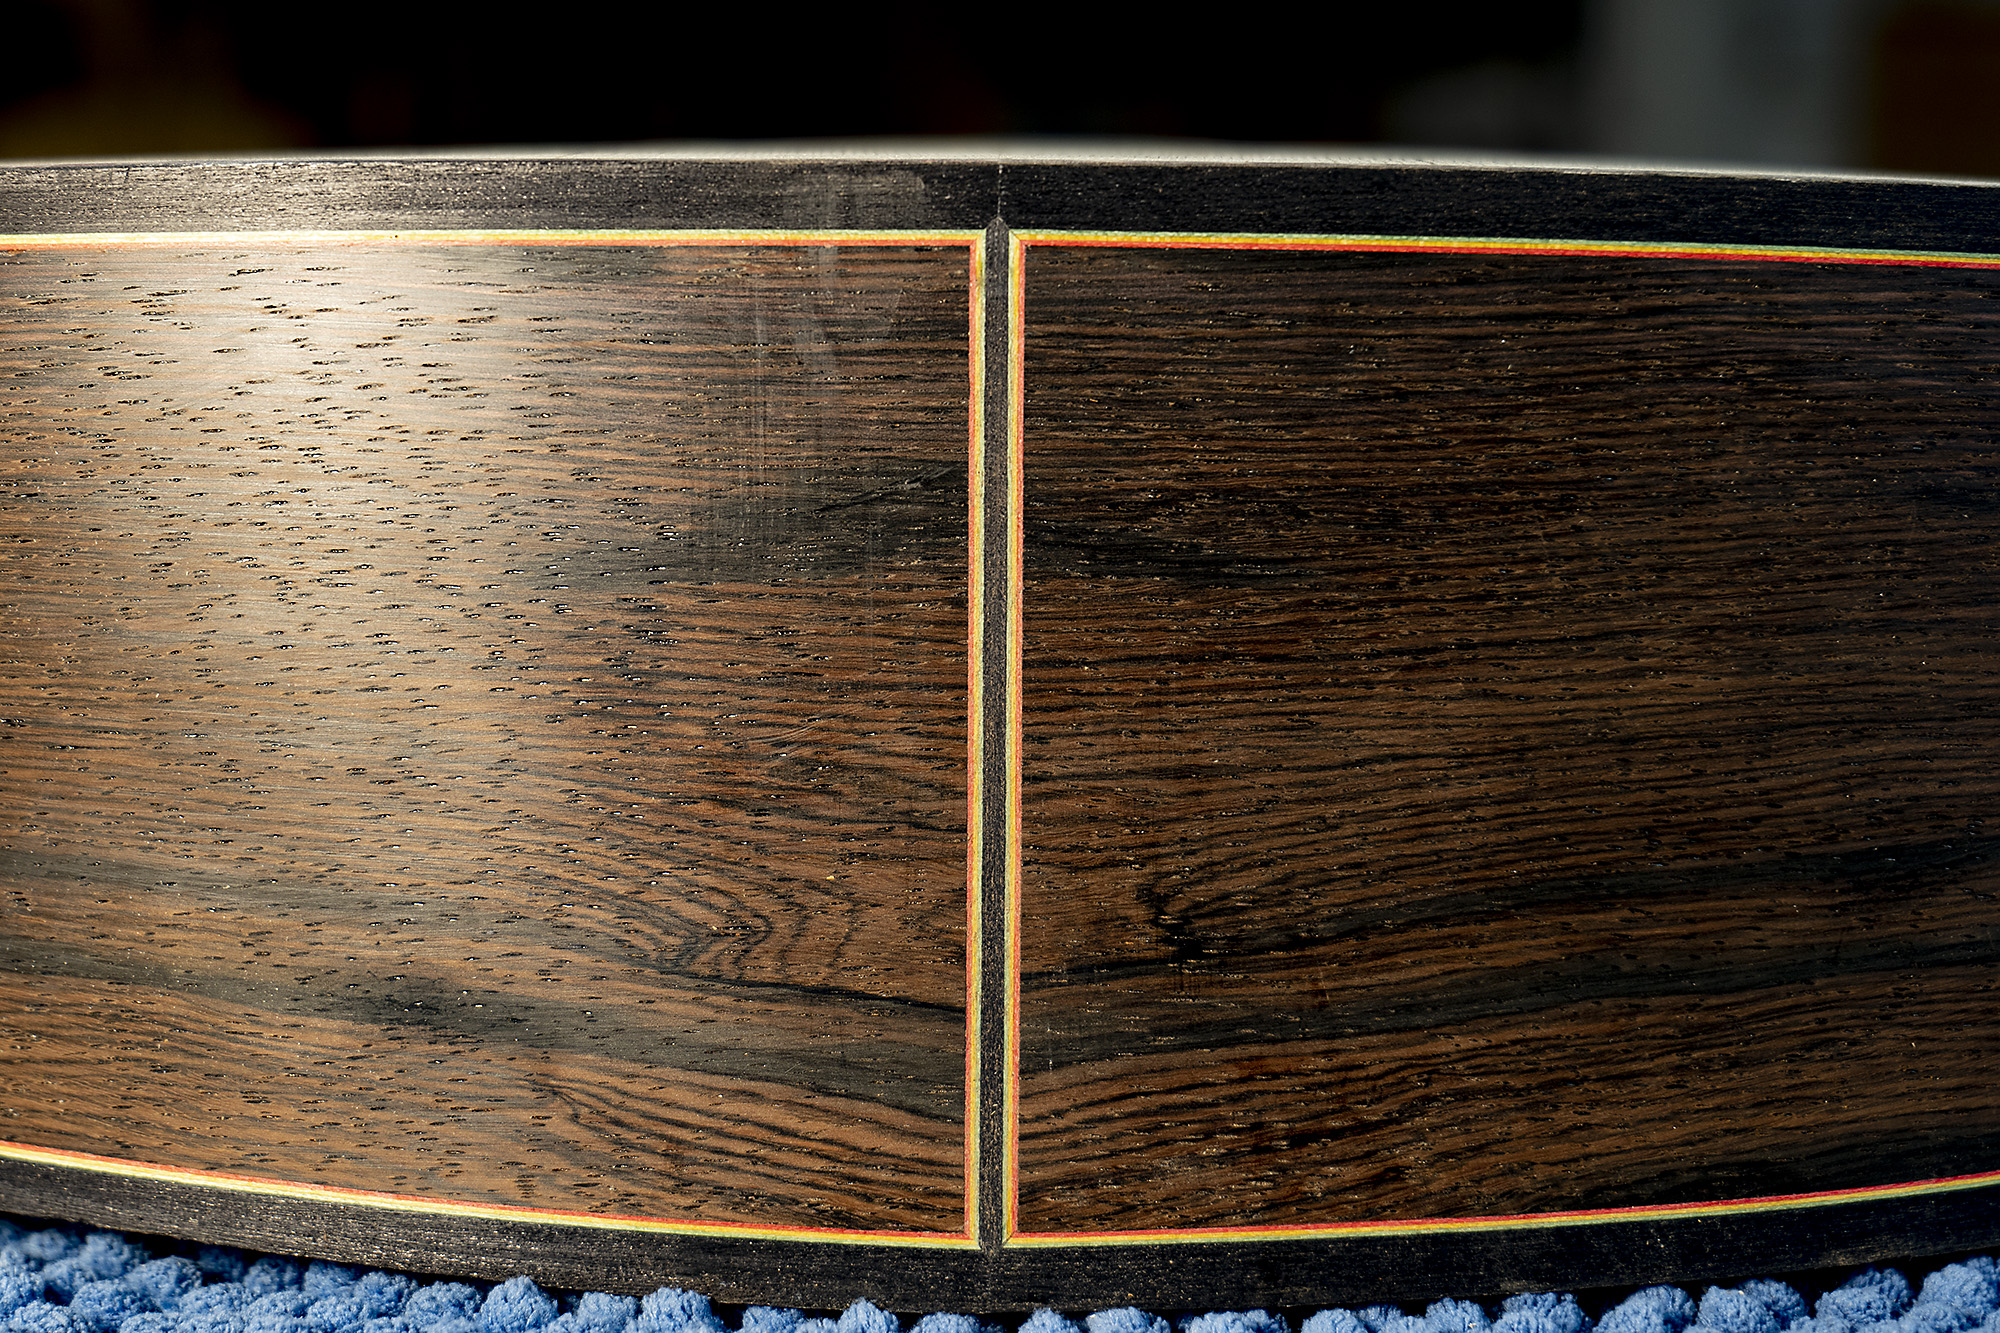
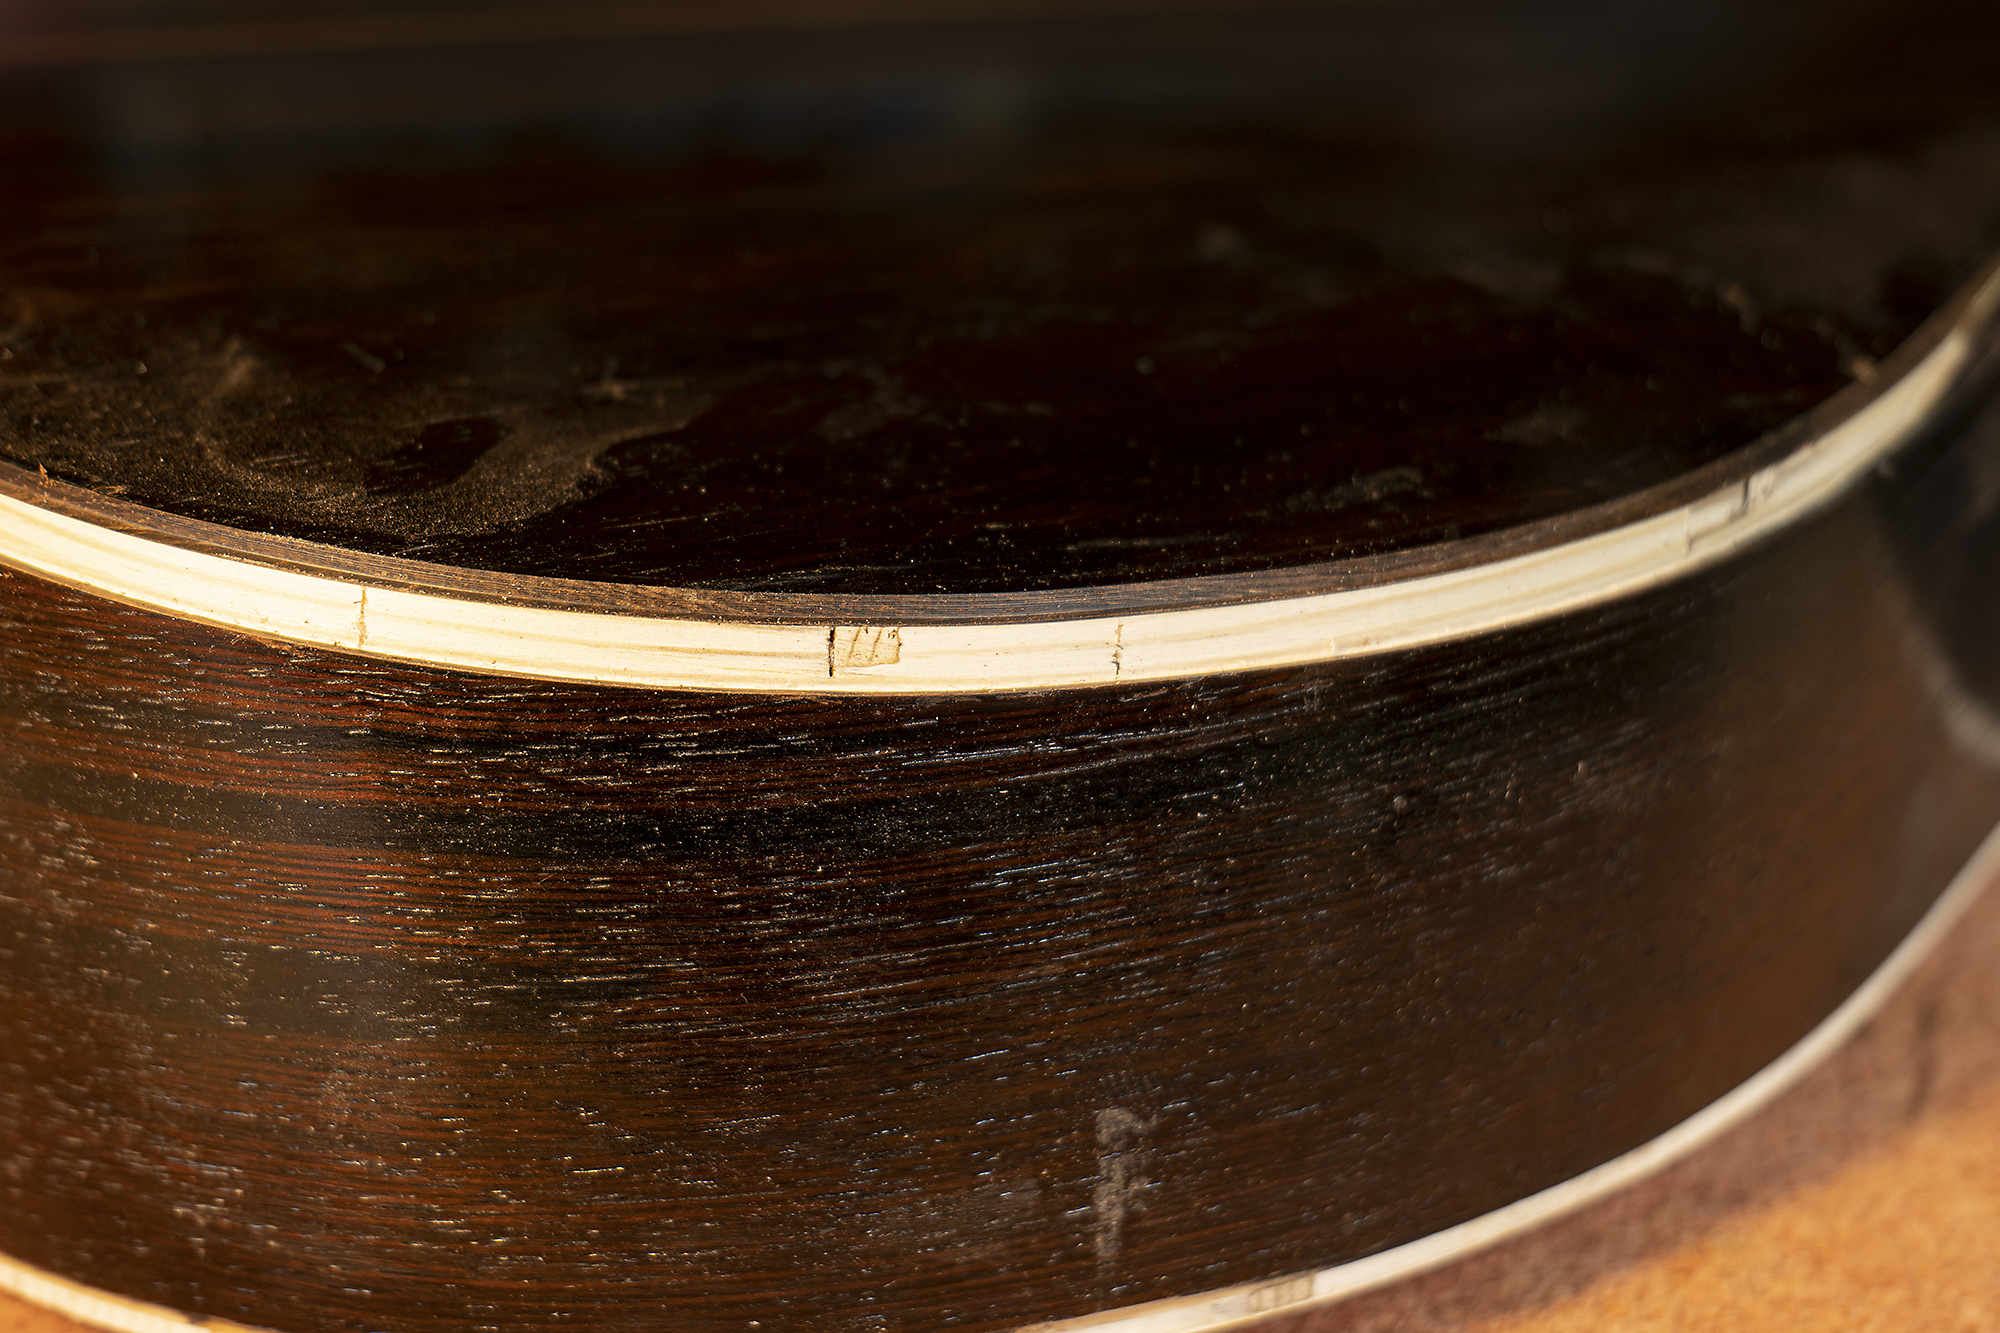 Bottom stepped ledge for binding and three colour trim
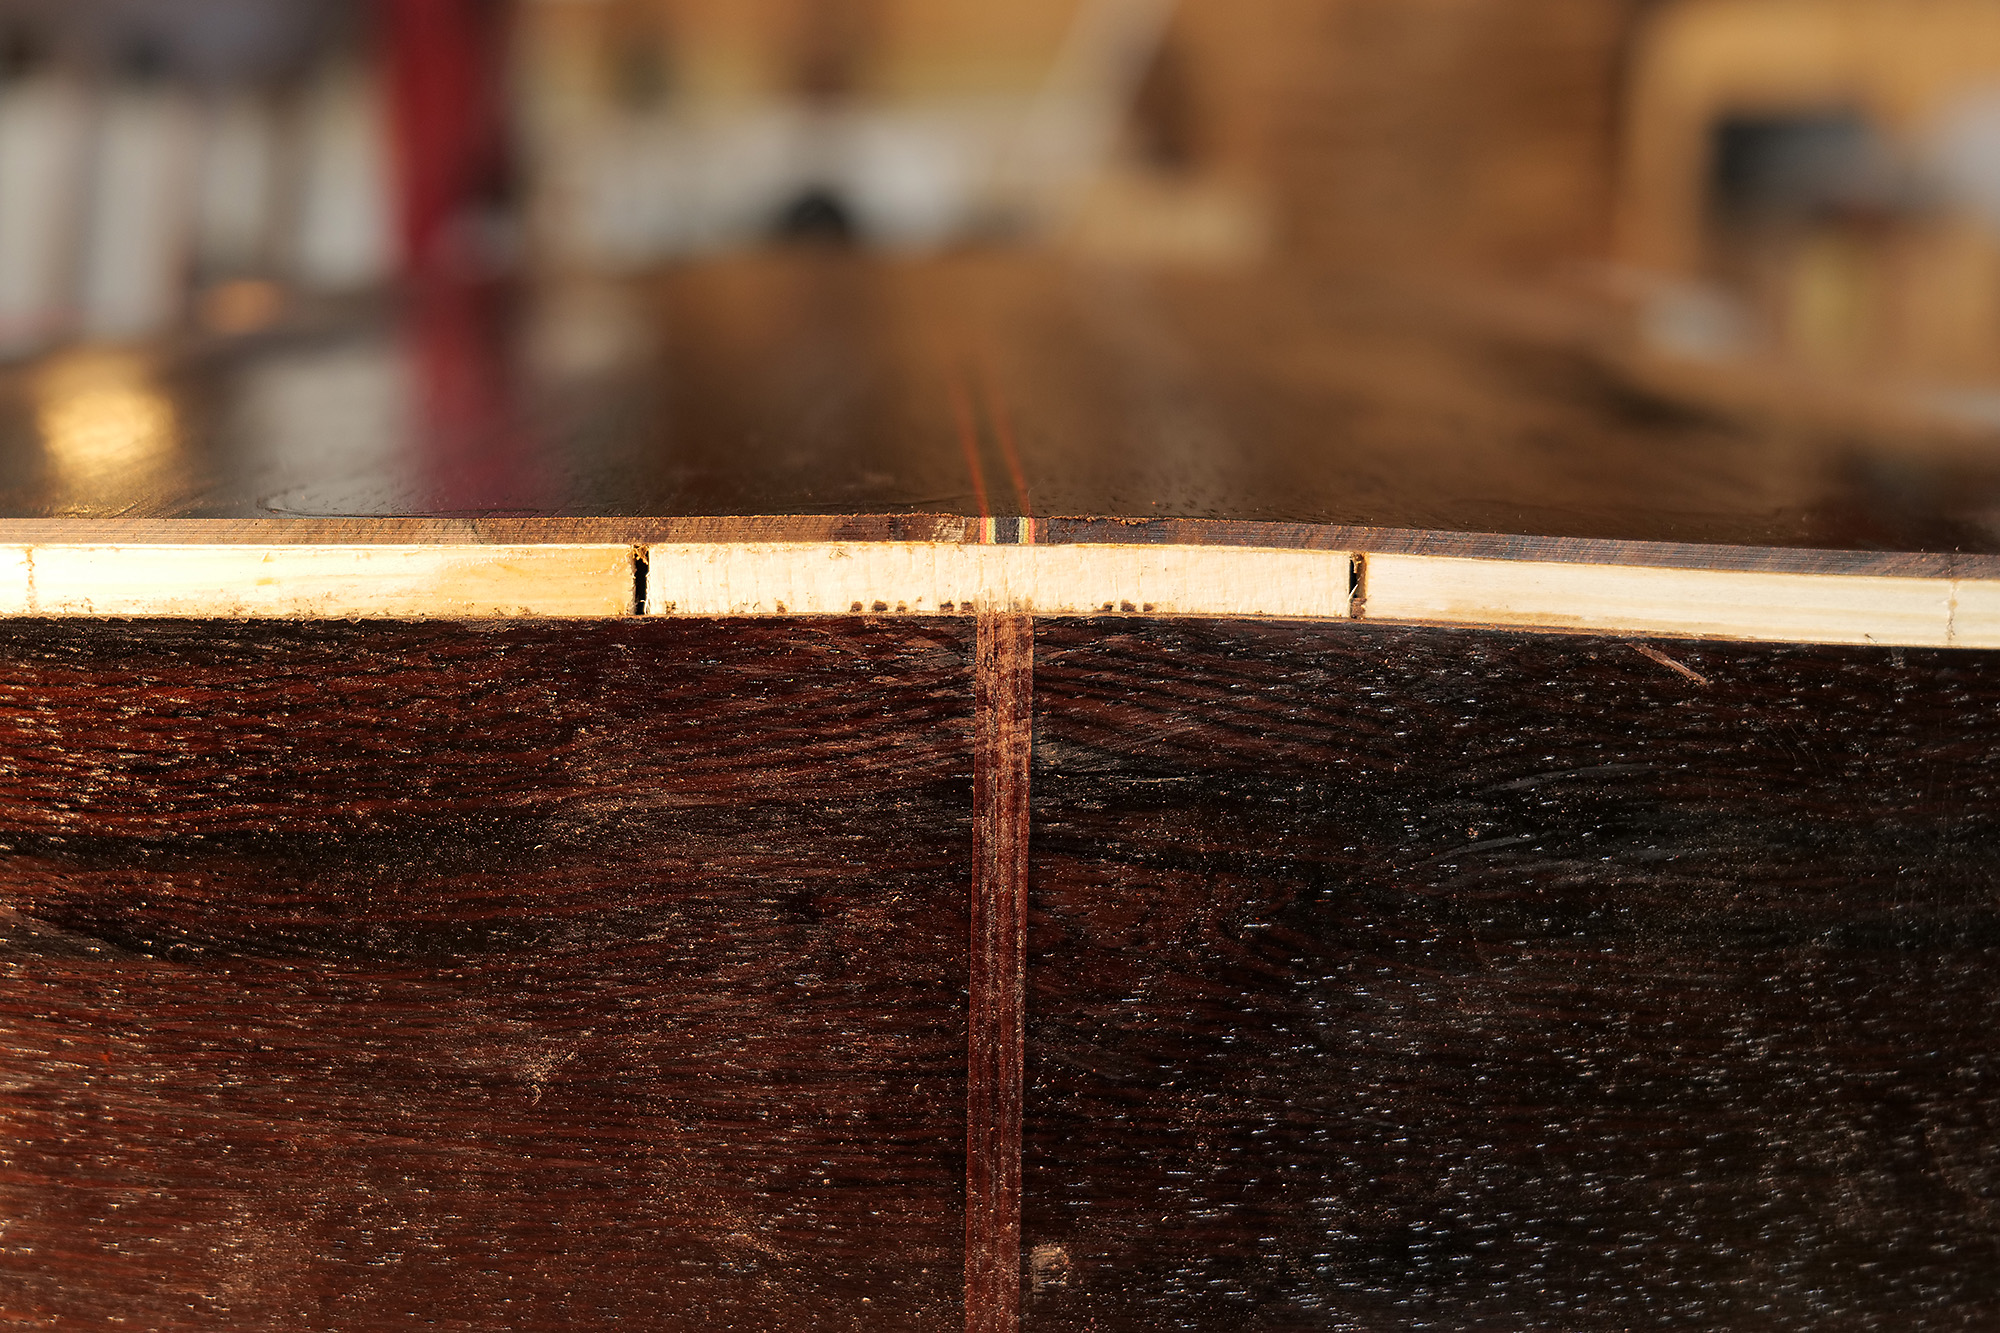
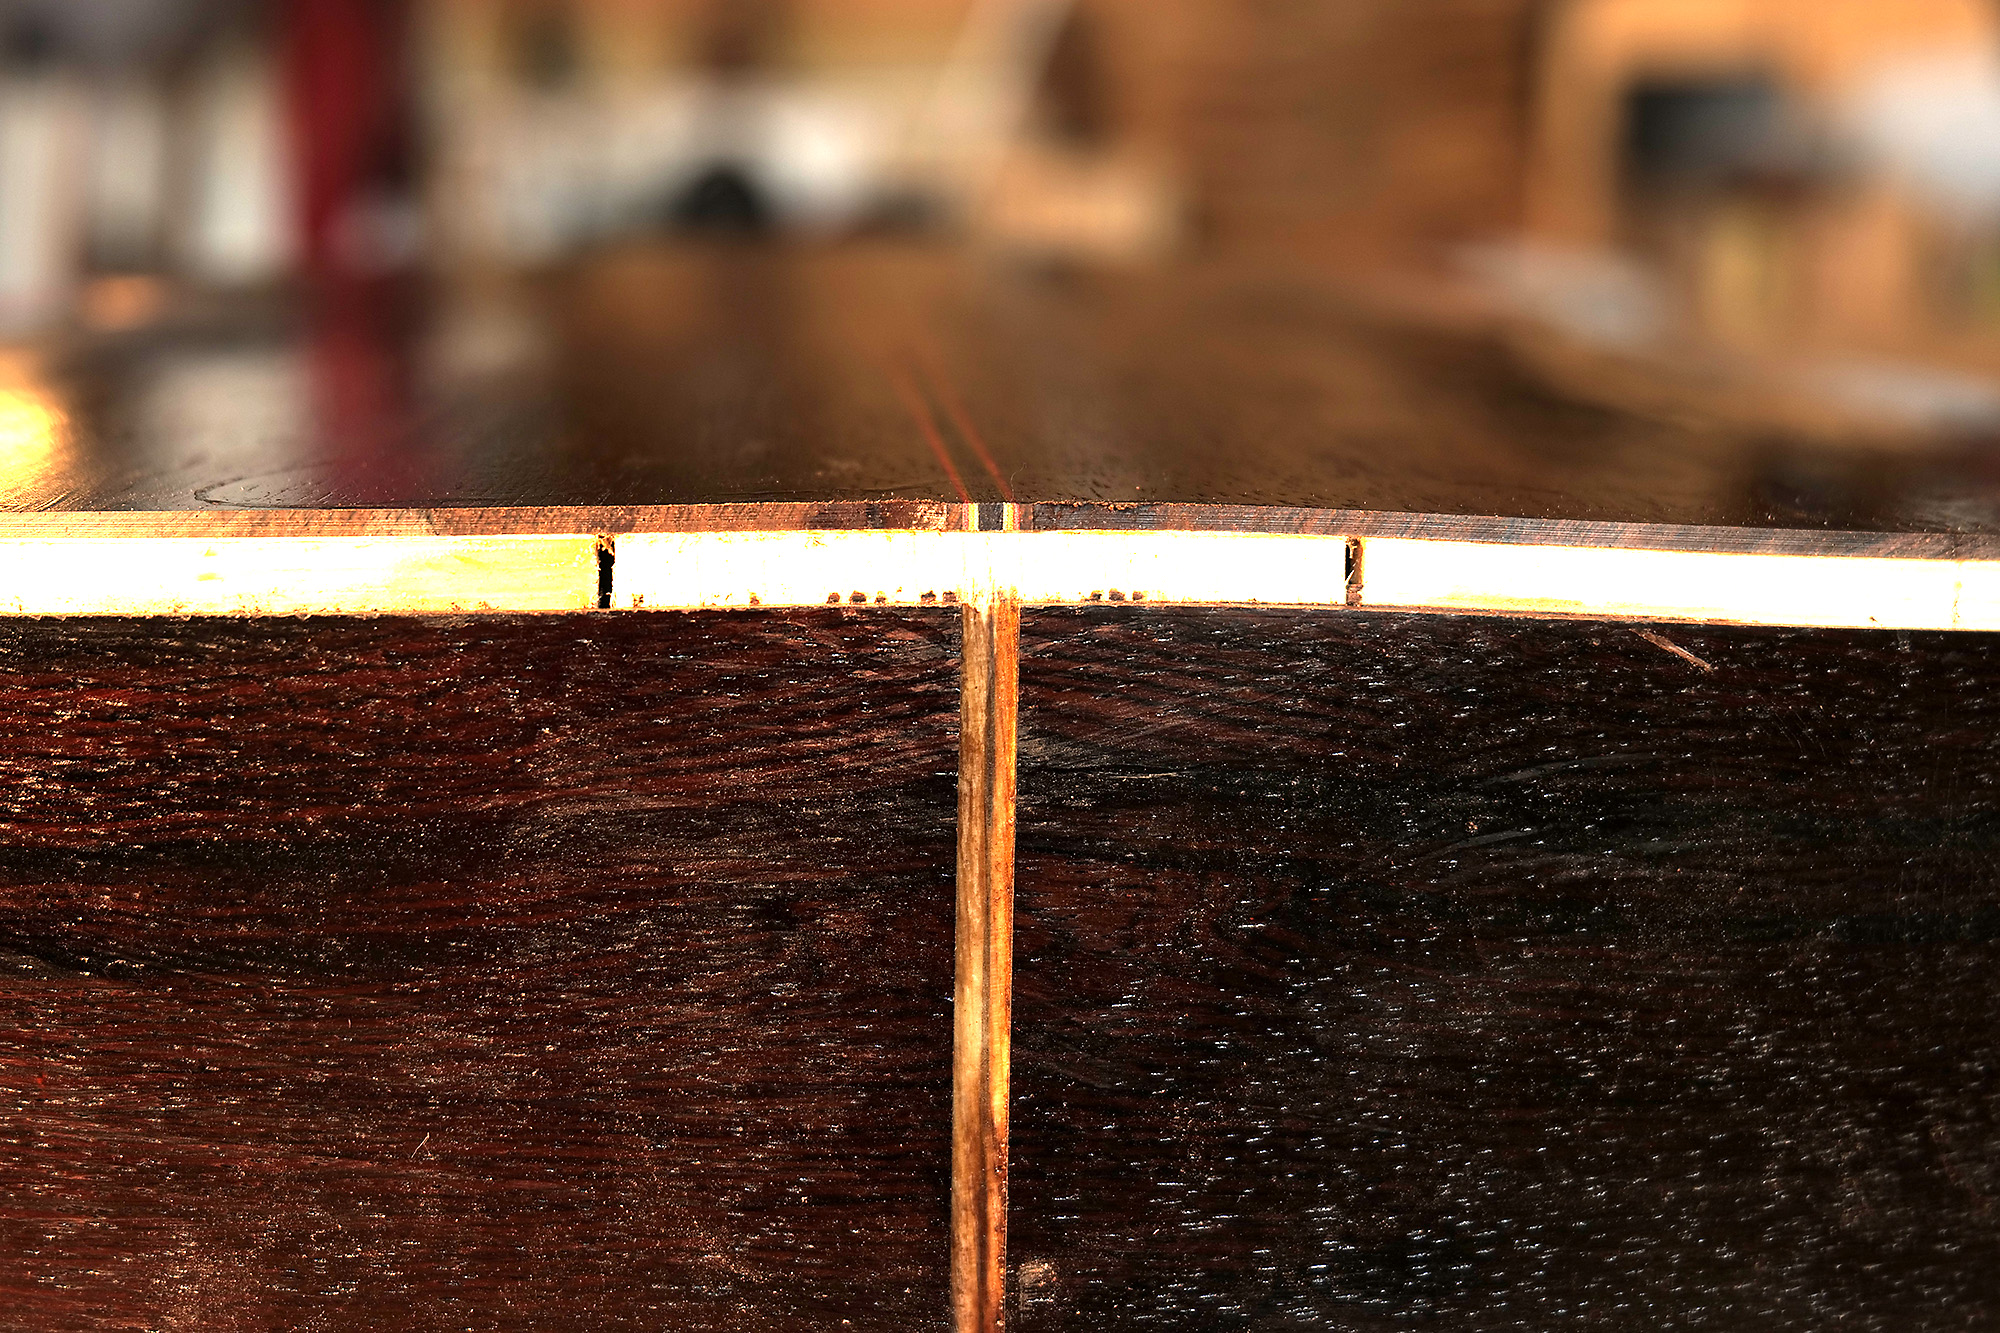
Fitting tail trim
The sides are joined to the tailblock leaving a space for the trim. While routing, this space is occupied by a piece of scrap wood of the correct width. Photos right show the sequence.
 Sacrificial wood in place
 Sacrificial wood removed
 Final trim in place and mitred
 Tail trim mitred into the binding
 Tail trim lines up with centre back trim
.
Binding
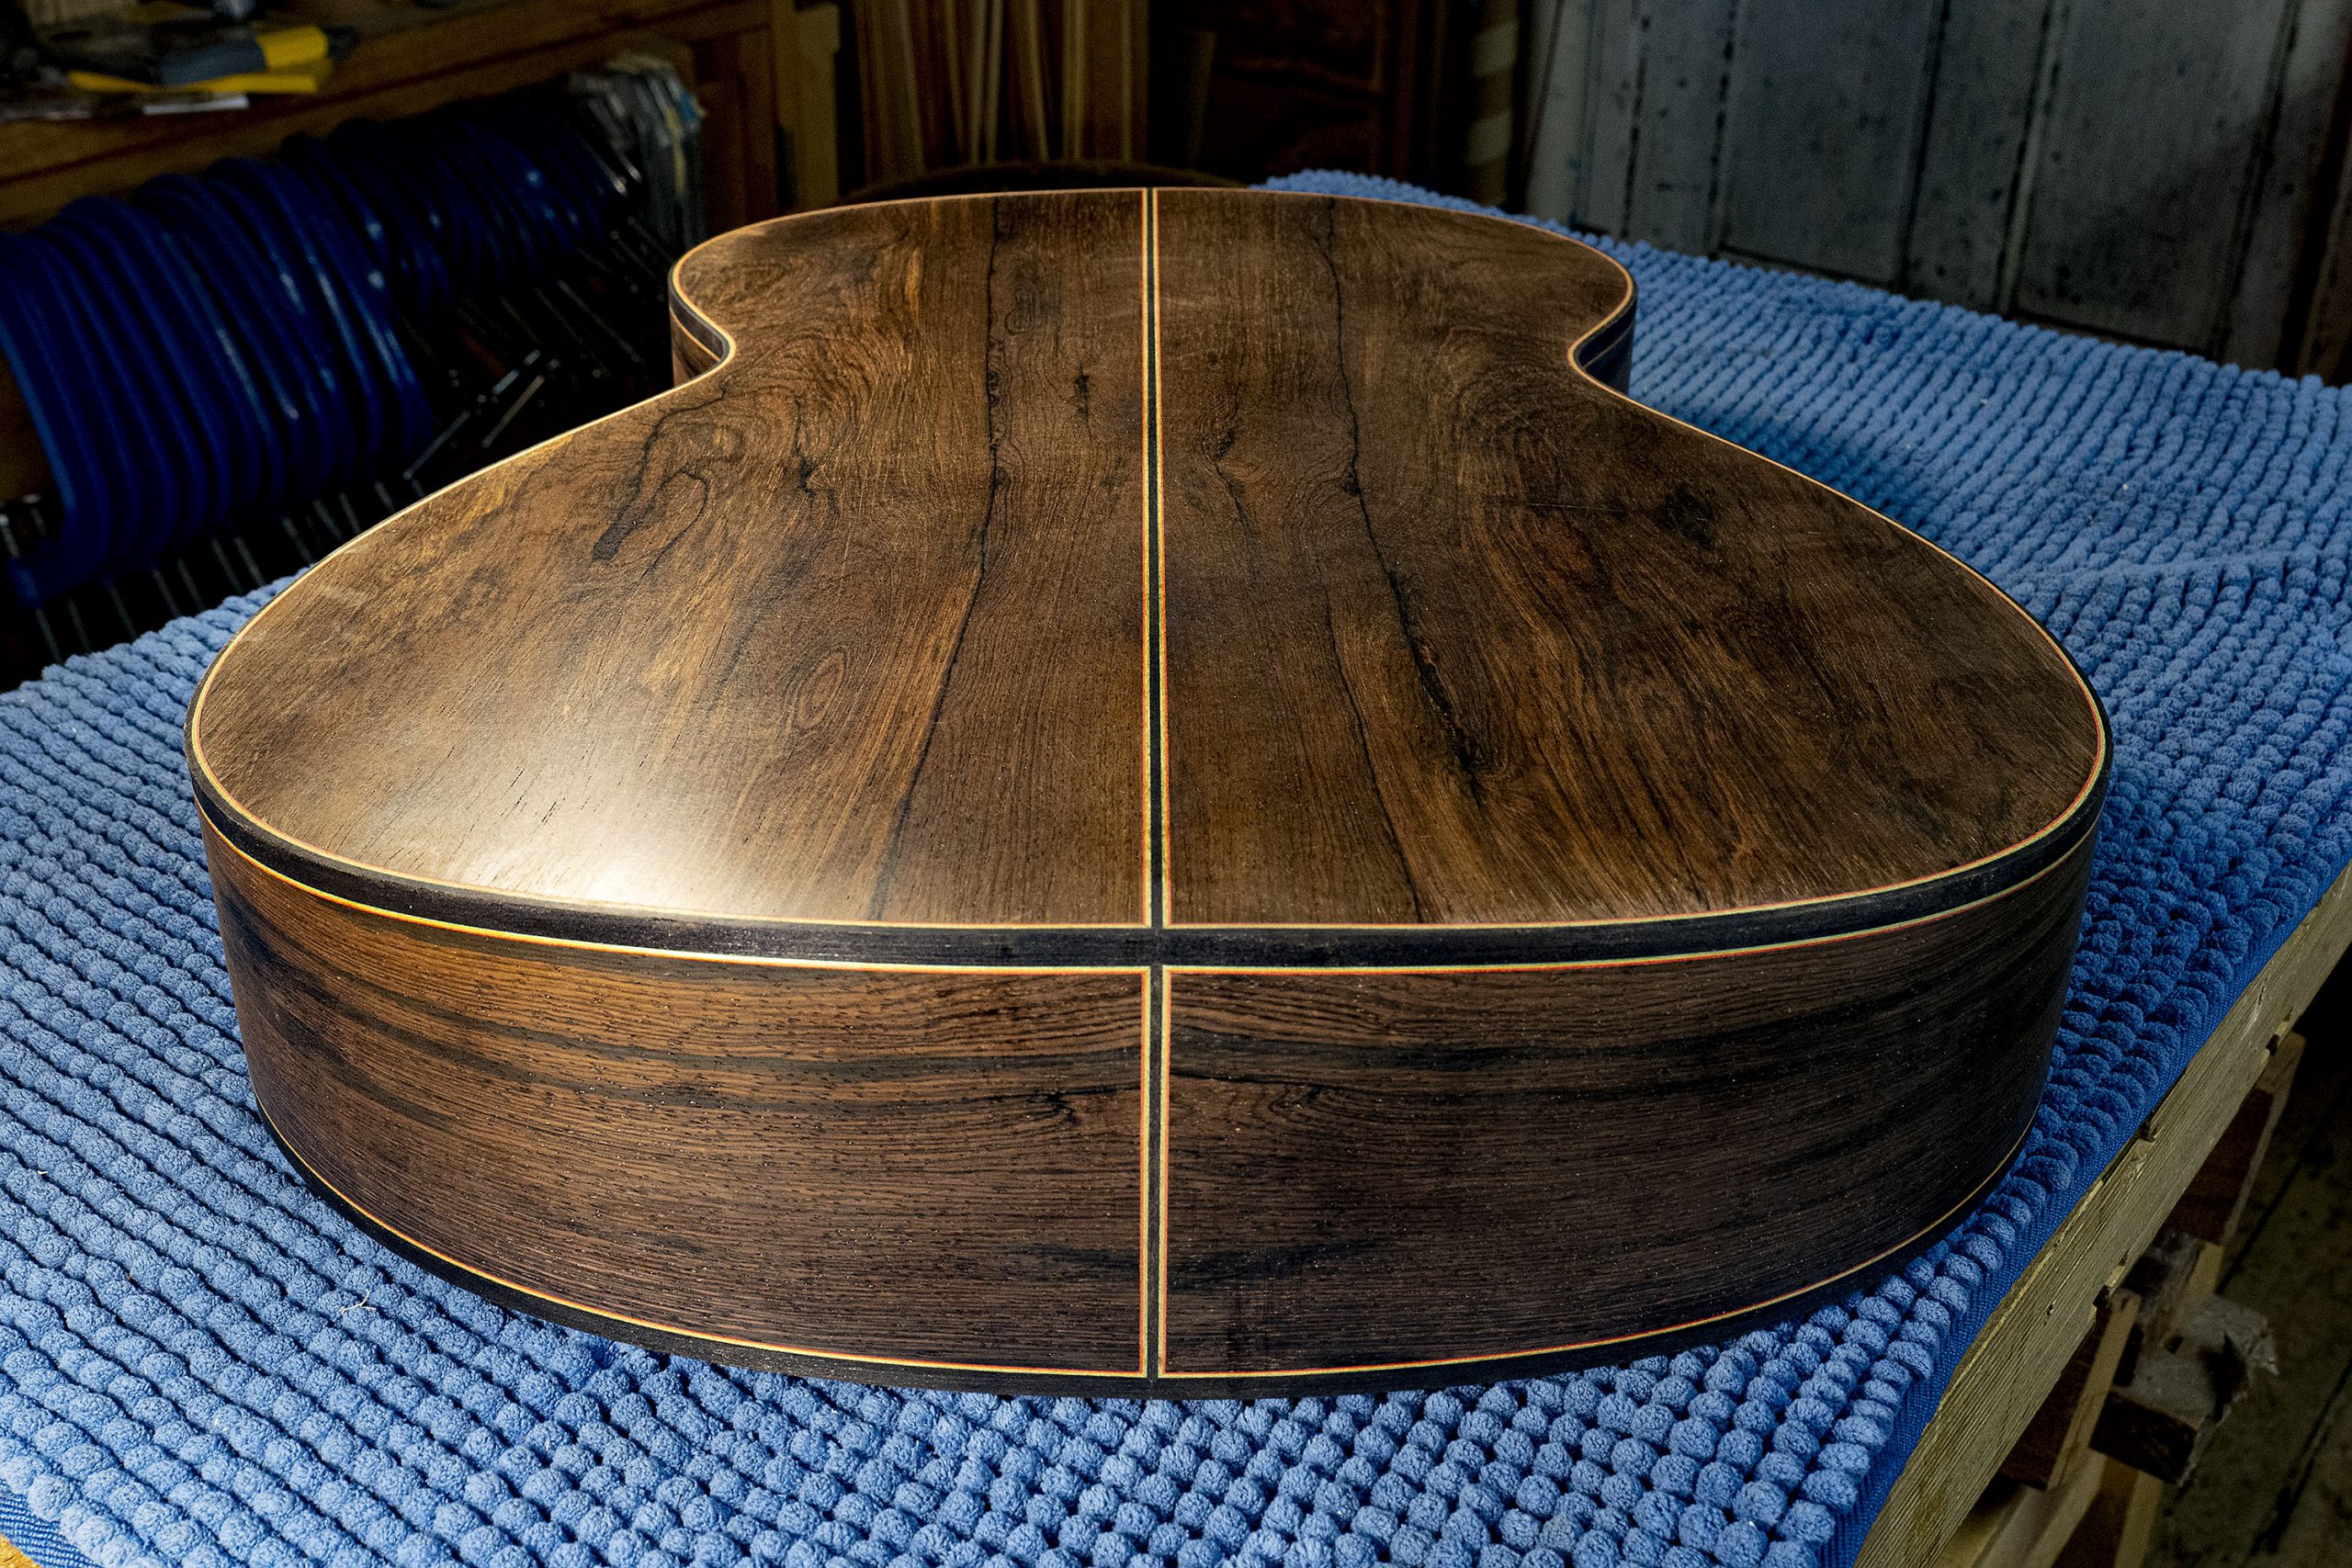
With the tail trim in place, I can bind back and front, photos above show the result. This after several more operations.
When first fitted, the binding needs trimming level with back and sides, and at the same time I scrape off the shellac lacquer. Then the binding must be sealed to ensure all gaps, however invisible, are filled, and then scraped back again.
The trim on this guitar is not my standard MS trim, but is black Rocklite binding with arrow-head and red pinstripe top trim and my favourite red/gold/green purfling around back and sides.
Finally back, front and sides are sanded smooth. The body is now ready for its neck.
 Binding with red pin stripe and arrow head trim