Long neck mandolin project part 3
Assembling the back and sides
With the finished back settling on the shelf, I was able to get on with bending the sides. When bending guitar sides, I use a Fox bending jig to start with and then move on to hand bending, but for the simpler mandolin sides I bend entirely by hand, on an electrically heated bending iron.
Sides are always bent exactly to shape, rather than bent approximately and forced to the shape of the mould when gluing to back and soundboard. This is to avoid internal stress, as mentioned in part 2
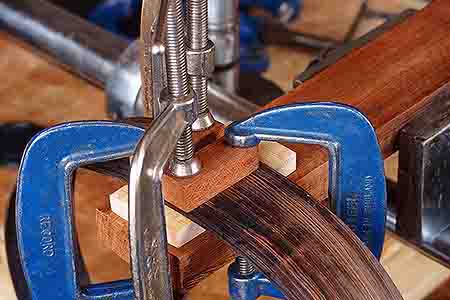
Here the sides are glued and clamped to the tail-block. I’ve left a space between the sides where the tail purfling will fit.
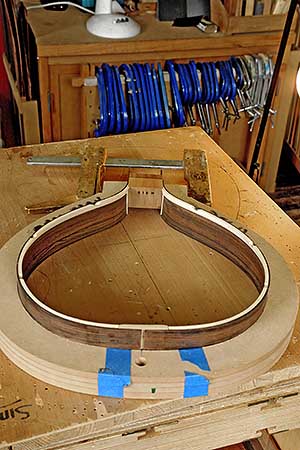
I don’t seem to have taken a photo of the heel-block clamped and glued to the sides, but here are the sides glued to both blocks with the bottom lining glued in place. The lining provides gluing area for gluing the back on; it has cut-outs ready to receive the ends of the back braces.
The sides have been scribed and cut down to receive the back so no pressure is required to pull the back onto the sides. Again, this is to avoid internal stress.
The serial number can be seen stamped into the heel-block.
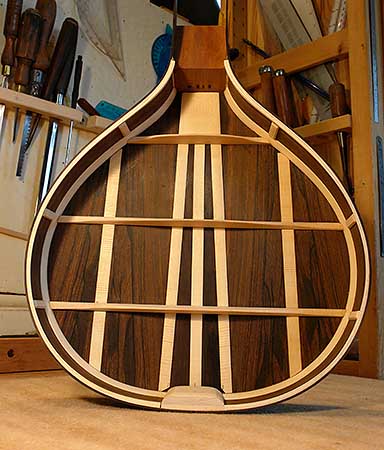
Again, no photo of the back being glued to the sides, but here’s the finished result. I’ve also added the top lining, which gives the gluing area for gluing on the soundboard, and side re-inforcements.
I don’t see these as providing much in the way of strength, but they should limit the extent of cracks in the unfortunate event of an accident.
The back and sides are now ready to receive the sound board.