
Long neck mandolin project part 2
Now the back is joined and sanded to final thickness, I have to re-inforce the joins. I do this with thin and lightweight cross-grained spruce (taken from soundboard offcuts).
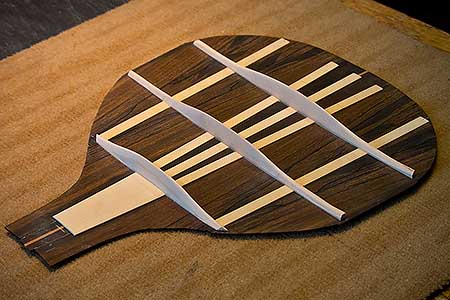
The centre three joins near to where the neck block will go are so close together that I re-inforce them with a single piece of spruce across all three joins. Below where the top brace will go all joins are individually re-inforced. The spruce will then have to be cut away from the areas where the braces will be glued.
The photos below show first the centre and outside spruce strips gluing (the others having been glued previously) and the back ready to receive the braces.
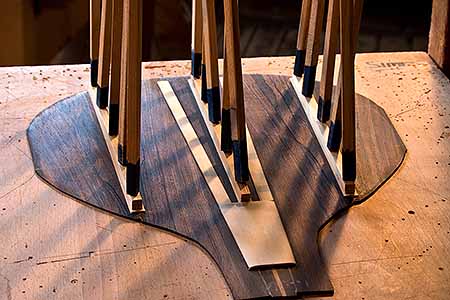

Now the back is ready for bracing. The braces are cut close to their final top shape and to the same curve as the mould the back sits in while gluing takes place.
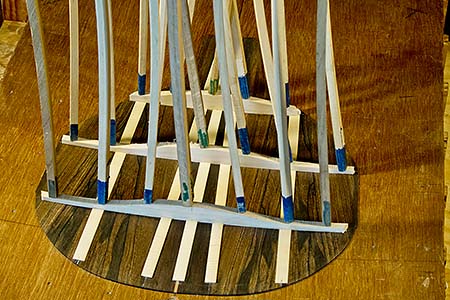
The braces are clamped using the go-bar jig, that wonderful simple and effective idea from Japan via the US. Later they can be trimmed and sanded to their final shape.
It takes a week or so for the back to settle. At the same time as the back is being pulled to the curve of the braces, to some extent the braces are being flattened slightly by the pull of the back (even though the back is being bent across the grain, much easier than bending along the grain). So the finished back sits on the warm shelf in my shop for a week or so to settle into its final form.
Allowing instrument components to find their final form before being assembled is important. It avoids the stress that develops if they try to do this later, when other components (in this case the sides and later the soundboard) would limit the movement taking place. Everything would then look fine, but the whole assembly would be under tension; tension that can affect the resonance of the finished instrument.
This is one of several reasons why taking time to build an instrument results in building a better instrument.